Author: saundralparker

Covering a 2 Yr. DT Planner + Covered Paperclips

I make a covered planner for my girlfriend and this year found a 2 year planner at the Dollar Tree.

I take the plastic cover off and then went through my stash of Wizard of Oz papers I bought a few years ago from Graphic 45 (now retired.) I found a page that has 1″ tall stamp-style pictures of all of the Wizard of Oz characters.

The planner is 7 1/2″ wide and 6 1/4″ tall. I cut 2″ off the height so it ends up being 10″ tall by 12″ wide. I scored it on the 12″ width at 2 1/4″ and turned the paper all the way around to the other side and scored it at 2 1/4″, but if you are right handed, you can score at 2 1/4″ and 9 3/4″. On the 10″ side, I scored at 1 3/4″ and 8 1/4″. I folded and burnished my scores, folding the top and bottom first, then folded in the sides so I could slide the front page of the planner into the left pocket and when I tried to insert the back of the book, I realized I needed more paper behind the book, so I changed that score to 10″ to give me another 1/4″ of paper for the back of the planner, so it would close without buckling.

I used another sheet of the Graphic 45 paper that has “there’s no place like home” at the top and bottom of the page for the planner closure cut both out to 1″ wide and then lined them with tear tape link: https://tinyurl.com/5rxszxp7. After adhering the two pieces back to back, I found they had a white line on the top and bottom, so I took a green marker and covered the white with it. If I had been in my craft room, I would’ve used an alcohol marker with a bullet tip, but used an Arteza brush marker that I had beside me. The closure paper is 1″ tall by 12″ long and I wrapped it around the planner so the end of the left side of the paper almost covers the front of my planner.

Once wrapped around the planner, the right side of the paper needs to almost cover the front of the book with a little bit of extra at the opening, so the book can grow with time. I put Velcro circles link: https://tinyurl.com/54y45ur6 , one close to the right end of the paper strip and a second Velcro circle about an inch to the right of the first circle. This is so you can move the velcro opening as the book grows. I added a third fuzzy side between the original circles on the strip with the other two fuzzy pieces so the first circle will always be attached to something. To attach it to the planner, I added tear tape to the underneath of the left side of the strip, all the way to the second fold (remember when we folded it around the planner, you should be able to see the two folds). Remove the backing from the tear tape and carefully place the strip in the center of the planner, making sure you lay the strip so the first fold is at the spine of the planner and the tear tape ends at the back right edge of the planner.

I took a sticker from the Graphic 45 set and adhered it to black heavy weight cardstock (Recollections Heavy Weight cardstock from Michaels) then cut the black cardstock to match the outline of the sticker with about a 1/8″ border. Then I added tear tape to the center of the sticker and attached it near the end of the paper strip on the front of the planner. To make sure the cover stays put on the planner, I added a small drop of glue to the inside under the top and bottom of the Wizard of Oz paper and then pressed on it to make sure it stayed in place.

Covered Post It Notes: I used small label post it notes that were about 2″ long and 1/2″ tall. I cut my paper to 4 1/2″ long and 1″ tall then put tear tape on the back of the post it note pads (I tore one pad in half so it wasn’t too thick for the planner) then laid the pads on the inside of the paper on the right edge, then wrapped the paper around them. My paper was only 4″ long, so wasn’t long enough, but I didn’t have more of that paper, and just went with it.

To make covered paperclips: I used small paper clips that are 1 1/4″ long. I cut paper to 3″ by 1 1/2″ wide and scored the 3″ length at 1 1/2″ then fold them in half making sure they are straight. Butt two pieces of cardstock together open and put two paper clips on the short end far enough away from each other you can put tear tape over them and the tear tape has to cover the edges and between and inside both clips. Do this to the front and back of the paper clips then fold the papers closed. You’ll need one more piece of paper that is cut to 3 1/4″ by 1 1/2″ scoring on the 3 1/4″ length at 1 5/8″ folded in half then put tear tape on the back of it (or wet glue.) You’ll place the folded part of this paper over the tops of the paper clips you can still see. If this paper is a little too long, snip off the bottom edge. I used stickers on the front and back of my paperclips and then I slid them onto the January page of my planner.

DIY Easy Rosette for 90th Birthday

My girlfriend turned 90 and I wanted to make a rosette for her to wear at the celebration luncheon we have planned for her.

To make the rosette, I took decorated papers out of a magazine called Stamps by Me that were a little over 11″ long. I should have cut my paper to 11″ before scoring but didn’t. It should measure 11″ long x 1 3/4″ tall (you’ll need two pieces using these measurements) and using my Martha Stewart score board, I scored the paper on the 11″ length every 1/2″ and then accordion folded the paper making a mountain fold first then a valley, mountain, valley, etc .. You’ll want to use a lighter weight paper so the rosette is easy to work with and so it doesn’t weigh a lot. Since you’re using a lighter weight paper, try not to press too hard when scoring. I made my first folds a mountain fold, so on the last fold, you’ll put tear tape on the back of this piece then lay it on the area before the first fold of your second sheet of paper to attach them together. I put tear tape on the front of the first piece of paper I used before the first fold and then attached the end of the second sheet to it to make a circle. You’ll want your folds to be well burnished in order for them to hold their shape. I fold as much of the circle into the center as possible, then push the center down so it is flat on the table. You should squeeze the circle to make it so the center is a very small opening and then while holding the circle in place, add a 2 1/2″ paper punched circle to the back with either hot glue or tear tape and wet glue (I used Tombow Mono Aqua glue) all over the backside of the circle. You’ll want to use heavier weight paper or line your paper with cardstock so it holds its shape. I used another circle for the front of the rosette then added 90 in 2 1/4″ die cut numbers that I layered three on top of each other for dimension and attached them with Tombow Mono Aqua Glue. If you don’t have any number dies, you can print numbers using your computer by doing a google search for “free printable numbers”, then printing them on cardstock in your printer.

I added colored diamonds that I got from Temu link: https://tinyurl.com/rn2m9umz to the front of the 90. Off camera, I added a jewelry pin link: https://tinyurl.com/5n9yxpea to the back of the rosette on the circle I glued there, near the top of the circle so the rosette will lay flat on her top…Otherwise, the rosette will be top heavy and will pull away from her shirt.

OneDaySaving 2 Sided Floral Wreath + Great Deals Til 11/30

The nice people at OneDaySavings were kind enough to send me this wreath at no cost. I am not affiliated with them and receive no monies for any products you might buy from them.

I liked the idea of making a diamond painting that I can hang on a glass-paned door and have the reverse side with the same design, but decided to use some of my stash of diamonds to make the back side a little brighter by using more reds and purples.

Onedaysaving website: https://www.onedaysaving.com/

Floral Wreath Link: https://tinyurl.com/98nx3387

Onedaysaving Black Friday Sale: Promotion 1: No threshold $10 discount coupon (Use the discount code to get $10 off your order. This time it’s no longer a percentage, but an amount of coupons.) Discount Code: 23BlackFriday10

Discount code validity period: November 12, 2023 to November 30, 2023

Quantity of discount codes: 300 in total, first come first served.

Number of uses: limited to one use per person

Promotion 2 (automatic discount when placing an order):

Save 3 USD on orders over 39 USD Save 6 USD on orders over 79 USD Save 10 USD on orders over 99 USD Save 30 USD on orders over 199 USD

Event time: November 12, 2023 to November 30, 2023

Please note1: Promotion 1 and Promotion 2 can be used together (for example, if you order $39, use discount code: 23BlackFriday10, you can save a total of $13)

Please note: The store always offers 2 free gifts for purchases over 50 USD, which can also be used in combination. If your order exceeds 50 USD, don’t forget to choose 2 free gifts!

First Broken Leg Crafty Buys, Temu, Amazon, Unity Stamps, Ebay

I had a lot of time to shop online in the last four months, so if you have any interest in shopping for inexpensive crafty things, I’m your girl.

Below are the links for the products I bought. I am not affiliated with any of these companies, and am not paid for sales related to the links. I provide them solely for you to easily find these products for yourself.

I have listed the links below in the order I showed them in the video.

I use a 6″ metal ruler throughout the video that I bought at Temu, and here’s the link for it if you are looking for one. It has both inches and metric measurements on it. https://tinyurl.com/m9ew6j3t

Ebay:

Stampin’ Up Uniquely Artistic Stamps: https://tinyurl.com/5n79yuu5

Stampin’ Up Free as a Bird Stamps: https://tinyurl.com/kvx2uz24

Temu:

Christmas banner: https://tinyurl.com/mwjxtcse

Christmas banner I’m making into cards: https://tinyurl.com/4d7az95j

Christmas sentiment stickers: https://tinyurl.com/be2m3xs

3 Plastic sticker boxes: https://tinyurl.com/tj9hh4pd

Artistic Stickers: https://tinyurl.com/2p8exrrb

Food label stickers: https://tinyurl.com/2czw7ukd

Zip top baggies: https://tinyurl.com/4uy8h6d8

You are Awesome: Sold out, sorry

Gingerbread men: https://tinyurl.com/29uncnee

Scrapbook 8 x 8″ papers: https://tinyurl.com/4abeekp2

Shiny enamel stickers: https://tinyurl.com/mr2cc278

T Ruler: https://tinyurl.com/mtdc7cm2

Sticky Mat for Misti: https://tinyurl.com/3pb62yxk

Metallic Watercolors: https://tinyurl.com/44hpactk

Background layered floral dies: https://tinyurl.com/mryb8czh

Cloud dies: https://tinyurl.com/yc4reudy

USA dies: https://tinyurl.com/bdeufxah

Tiny Foam adhesives: https://tinyurl.com/4uahcpt9

Happy Birthday die: https://tinyurl.com/2s4jabnj

Poinsettia die: https://tinyurl.com/2tyvaafr

Ebay:

Stampendous Jumbo Rose stamp: https://tinyurl.com/m9v34pw5

Tim Holtz Embossing Glazes: I could only find two sets instead of the one I bought: https://tinyurl.com/46sn58wm\

Temu:

Starry Night Washi Tapes: https://tinyurl.com/yc7t6xh3

2 white Brushes: https://tinyurl.com/3xv6mmv2

Happy Halloween Die: https://tinyurl.com/5h3tvmzm

Wood Bookmarks: https://tinyurl.com/2jktyfxj

Wood circles for flower earrings: https://tinyurl.com/bdh32jrf

Dried Flowers for earrings: https://tinyurl.com/58bshtwr

Unity Stamps: I talk about Cards for Cubs in the video and if you would like more information about them, here’s a link to their website. https://cardsforcubs.org/

Planner Girl Loving Life: https://tinyurl.com/2d8dkksn

Planner Girl Call it a Plan: https://tinyurl.com/bdfcedyk

Planner Girl You Got this: https://tinyurl.com/mx7uwv2s

Wonderful Girl: https://www.unitystampco.com/wonderful-girl/

Temu:

Girl with Ice Cream: https://tinyurl.com/4w79newn

Amazon: The last stamp set I show with the Thinking of you font I loved, came with the other stamp set you see laying behind it on screen. I knew the other stamp set came as a set, but couldn’t remember which other set until I researched it. Here’s the link to both stamp sets: https://tinyurl.com/43y7mv4a They were less than $11 when I bought them and currently still are.

$100,000 One-of-a-Kind Paper Purses

You’ll need two pieces of same color cardstock cut to 8 1/4″ x 10 1/4″ each.

Scoring: Score both pieces of cardstock the same way…. On the 10 1/4″ length, score at 2 3/4″ and 9 3/4″ (I’m left handed, so I turn the cardstock around so the 2 3/4″ score is on the right side, and then I score at 1/2″…if you are right handed, it’s probably easier to leave it so the 2 3/4″ score is on the left side of the paper, then score at 9 3/4″) I’m sorry if I confuse you going forward, as I sometimes refer to this score as the 1/2″ score. On the 8 1/4″ length, with the 1/2″ (or 9 3/4″) score at the top of the score board, score at 5 1/2″. Turn the paper so the 1/2″ or 9 3/4″ score is on the right side of the score board, score at 1 3/8″ ONLY down to the score that’s toward the bottom of the paper. I forgot to tell you this in the video, I just had Shelli rub out the score line that went past where it should have stopped. To fix that, you lay the paper with the raised side of the score face up, and take a bone folder, the back of a butter knife, or we used a diamond painting tool’s back end to rub the score and basically rub it so you no longer see the score line.

For the lid of your purse, you’ll need another piece of cardstock that is 7″ x 5″ and score on the 5″ length at 1/2″. These are the correct measurements and not what I said at the beginning of the video.. Designer paper layer 6 1/2 x 3 1/2″. Corner round bottom two corners (farthest from score). Kadomaru Pro from Amazon is my favorite.

Fold and burnish all of three pieces of cardstock on their scores. The one score that only goes part way to the bottom of the paper, you’ll pinch that in, don’t fold it all the way down. With the 1/2″ or 9 3/4″ score on the right side, you’ll find a rectangular box on the bottom left, you’ll cut from the bottom up on the vertical score to the horizontal score line, getting rid of the vertical score line and then cut an angled wedge out on the right and left side up to the horizontal score line. Then keeping the paper in the same position, go to the 1/2″ (or 9 3/4″) score and cut out the bottom rectangle long skinny box and then turning the paper on its side, cut angle wedges on the top and bottom of the rectangle left behind.

To put the purse together, lay the two papers side by side with the 1/2″ or 9 3/4″ score on the right side of each. Put tear tape from the right side to the 1/2″ score covering the entire wedge, remove the backing, then lay the right paper over the left to the 1/2″ score but not over the score and lining up the score that runs horizontally across the two papers. Then put tear tape on the right paper’s 1/2″ score and fold the left half over so all that’s left sticking out is the 1/2″ score area on the right side. Put tear tape on the scored area and fold that onto the bag, closing it up. Flip the bag on it’s end so you have two of the sections that you angled the edges. Fold into the purse one of the bigger rectangles, then put glue on the inside of the angled cut piece and fold it onto the rectangular piece, then fold in the other angled glued piece and finally glue down the last rectangular section. Rub inside to make sure it’s well adhered.

Lid: Put tear tape under the 1/2″ score (make sure the score is well folded) then attach the lid to the bag centered at the top and with the bag pinched at the top so it’s easy to attach the lid. Cut black strips 1 1/4″ by 5 1/2″ long to adhere to the center of the purse, then once the lid is attached to the purse, add another strip to the center of the lid of the purse lining it up with the strip underneath Put Velcro (from Dollar Tree) about 1/2″ from the opening centered on black paper strip. Open purse and then rub to ensure both sides are well adhered.

ORGANZA RIBBON! Shelli made a crossbody bag..her ribbon was about 2 ft long and she layered 1/4″ white organza ribbon onto 1/2″ lavender organza with tear tape to make a more substantial ribbon handle. I used about 15″ of a heavy silver ribbon (not sure where I got it). Using a Big Bite or Crop a Dile on the smaller hole setting, we punched one hole on one side of the pinched score and one on the other side of the score using a marking on the Big Bite to make sure the holes were the same distance from the top of the bag. I cut the end of the ribbon on an angle and ran the ribbon from the inside to the outside with a knot on the other end of the ribbon, then pulled it to the knot and ran the other side from the outside to the inside then knotted it. You may need to double knot to make sure it doesn’t pull out.

Decorations: If you use brads, add them before gluing down black strips. We used sticker buttons and laid them on the black strip, centering each. All embellishments we used were from my stash, so I have no clue where I got them or when.

Decorate Your Nails with Leftover Diamonds, Halloween

I checked before trying this, and found craft glues are safe for using on your nails. This technique is great for the day of trick or treating or a Halloween party, as the diamonds will only stay on your nails for a day or so, depending on if you wash your hands….To remove them, if you wash your hands and rub the nail with the fingers from the other hand, the diamonds will wipe off relatively easily. DON’T use Super Glue unless you want the diamonds to stay for a long time….and, I didn’t check to see if it’s safe to use Super Glue on nail polish. Step one, paint your nails whatever color you choose..I always use a base coat and top coat with my nail polish. The polish I used for this hack was from Dollar General store and was $1.50. It lasted as well as O.P.I nail polish, but did discolor my nails a little bit, even using O.P.I. base coat. O.P.I top coat gets really gummy on me, so I didn’t use it on this project. Step two….whatever craft glue you like, I used Tombow Mono Aqua Glue and squirted the glue onto the nail in the pattern I wanted the diamonds to lay in. I did every nail a little differently, and using the diamond tool you get with diamond paintings, I picked up black diamonds and laid them on my nail and then waited for the glue to set up (so the diamonds don’t slide around) before going onto the next nail. You need to add enough glue that the diamonds have glue under and around their edges so they stay on longer. I played around with this and got my diamonds to last three days using this method, losing a few along the way. I hope you give this a try with your kids as it’s a fast and easy way to decorate your nails for any holiday, and especially to make them fun for Halloween. The brighter the nail polish, the better the results. I thought the orange I bought was bolder than it turned out to be, so when in doubt, go bolder for a more impressive outcome.

Paddington Bear’s Coat Card

I apologize that my circle light swung into the frame and I didn’t know it. These things happen sometimes, but it still makes me feel terrible.

I bought these papers and ephemera because I had purchase the briefcase the bear carries for Finn for Christmas full of Paddington Bear books, and thought it would be fun to send his dad a Paddington Bear card for Father’s Day.

Use 5 x 10″ blue cardstock scored on th 10″ length at 2 1/2″ and 7 1/2″ then turn to the 5″ length and score at 1″. Cut on the 2 1/2″ and 7 1/2″ scores up to the 1″ score and then fold and burnish the three sections where you have cut. I folded the long scores so it becomes a coat..then cut the shoulders out by folding the 1″ score up on the back of the coat and cut it off on the front of the coat..the front is where the opening is. Then angle a cut on the top right about 1/2″ from the top and angled into the top about 1/2″ from the right side. Then bend the card in half so you can make the same angled cut on the other side. Cut the 1″ score straight down from the center so it lines up with the opening of the coat. Then cut an angle straight cut from the opening on the 1″ scored area to where the shoulder cut stops, closest to the center of the coat to create the collar. In the end, I cut this collar off straight across the top of the card and used foam squares under the collar to glue it to the top of the card so it looked better..

For the (sleeves) arms, I cut two strips 4″ long by 1″ and I used Night of Navy ink by Stampin’ Up and inked around the arms, then put foam tape under the strips, and laid the arms about 1/8″ from the edge of the card and once I attach the sleeves, I cut the top of them so they match the shoulder angle. I added two pockets in navy blue that were 1 1/4″ wide by 1 3/4″ tall and inked the edges. I used a thin tear tape 1/8″ wide and put the tear tape on three sides in case I wanted to put something in the pocket once it was attached (which I didn’t.) I should have put the pockets on before the sleeves, but didn’t and had to pick up my sleeves to add the pockets.

I found an image of the bear wearing his hat, so I took a piece of red cardstock and freehand the hat with a black marker then cut it out making sure the marker lines were intact. I retraced the marker lines when I was finished so they made the hat stand out. I cut ot the hat and glued it to the coat on an angle.

I glued a piece of the patterned Paddington bear paper that was 4 3/4″ x ” inside the card then cut the excess off the back at the top once the coat was closed.

I had the word “hello” die cut three times and glued together and glued this to the left pocket, then had some rub ons that I glued to the other pocket.

To make the coat toggles, I drew a toggle shape on a light brown cardstock then cut it out and traced it onto the paper 12 times and cut those out then glued three together, four times to make four toggles. I used a black twine that was way too thick and hard to work with, and wrapped a length around a toggle twice and left a small gap, then wrapped it around another toggle and put a piece of Velcro under both toggles gluing them in place with hot glue. I did this again for the second set of toggles, and hot glued the Velcro to the coat.

I had a Hero Arts stamp/die set called “Happy” that I used to stamp on 2 1/2″ round punched white cardstock in black ink with “Fathers Day” that came in the same stamp set. I put a 3″ scallop circle in red under the white round and glued these to the center of the inside of the card.

I also glued some Paddington bears from the set I bought on Craftstash. The card fits into a 5×7″ envelope, but wouldn’t have if I had glued the hat above the coat.)

Paddington Bear : (I couldn’t find it on the craftstash.us site, only their uk site, fyi)

Paper: https://www.craftstash.co.uk/paddington-8in-x-8in-paper-pack-24-sheets-paddington-collection.html

Ephemera Pack: https://www.craftstash.co.uk/paddington-a6-ephemera-pack-set-of-32-paddington-collection.html

Using Scrap Cloth & Rope to Cover a Bucket

I had leftover fish outdoor fabric from making a pillow that I bought at Joanns link: https://www.joann.com/minnows-indigo-outdoor-fabric/19169721.html and bought a skein a rope at a garage sale that I thought I could cover with the fabric and then hot glue to a metal bucket.

I cut the fabric to about 2″ wide and the length of the fabric (around 52″ wide) in strips. I used four strips to cover the rope and the bucket. I laid the rope in the center of a strip and hot glued the center of the rope to the center of the fabric. Then I covered the end of the rope with a scrap of fabric and hot glued the fabric around the end of the rope. Next, I hot glued one side of the fabric around the rope as taut as possible, and then continued down one side of the fabric to the end of the rope. Then take the other side of the fabric, put hot glue under it and roll the fabric on a silicone mat so the material surrounds the rope and keeps your fingers out of the way from being burned. I did this about a foot at a time as I seemed to be able to control that much rope.

If you decide to do this project, instead I’d use a cotton clothesline rope like this. https://tinyurl.com/nx2xy6k2

When you get to the other end of the rope and have surrounded it with fabric, take another scrap of fabric and wrap it over the end and around the sides so it looks finished like the rest of the rope. Once you’ve covered the entire rope, take your bucket and starting at the spot near the top you’ve chosen as your starting spot, hot glue the end of the rope to the bucket and then keep gluing and wrapping the rope to the bucket, making sure there are no gaps between the bucket and the rope and no gaps between each row of rope, so you’ll put glue on the bucket and on the top of the rope that you’re adhering to the row of rope above it, since you are working your way down the bucket. Keep gluing and wrapping until you run out of rope. I was able to wrap mine around the bucket and under the bottom of the bucket so it all looks finished.

If you have any shiny areas where the hot glue is too thick, use either a heat tool or a blow drier and melt the hot glue and wipe it off with the metal ends of your scissors. Heating it will also melt the frayed fabric ends that might be sticking out and will eliminate any hot glue strings as well.

My plan is to put a napkin inside the bucket and wrap it over the top so it looks finished.

A Father’s Day Miracle

If you read my blog, you know I’ve given up writing my personal thoughts here. I had written hundreds of them in the early years of the blog, but have lost my mojo in recent years. This Father’s Day made me rethink my message.

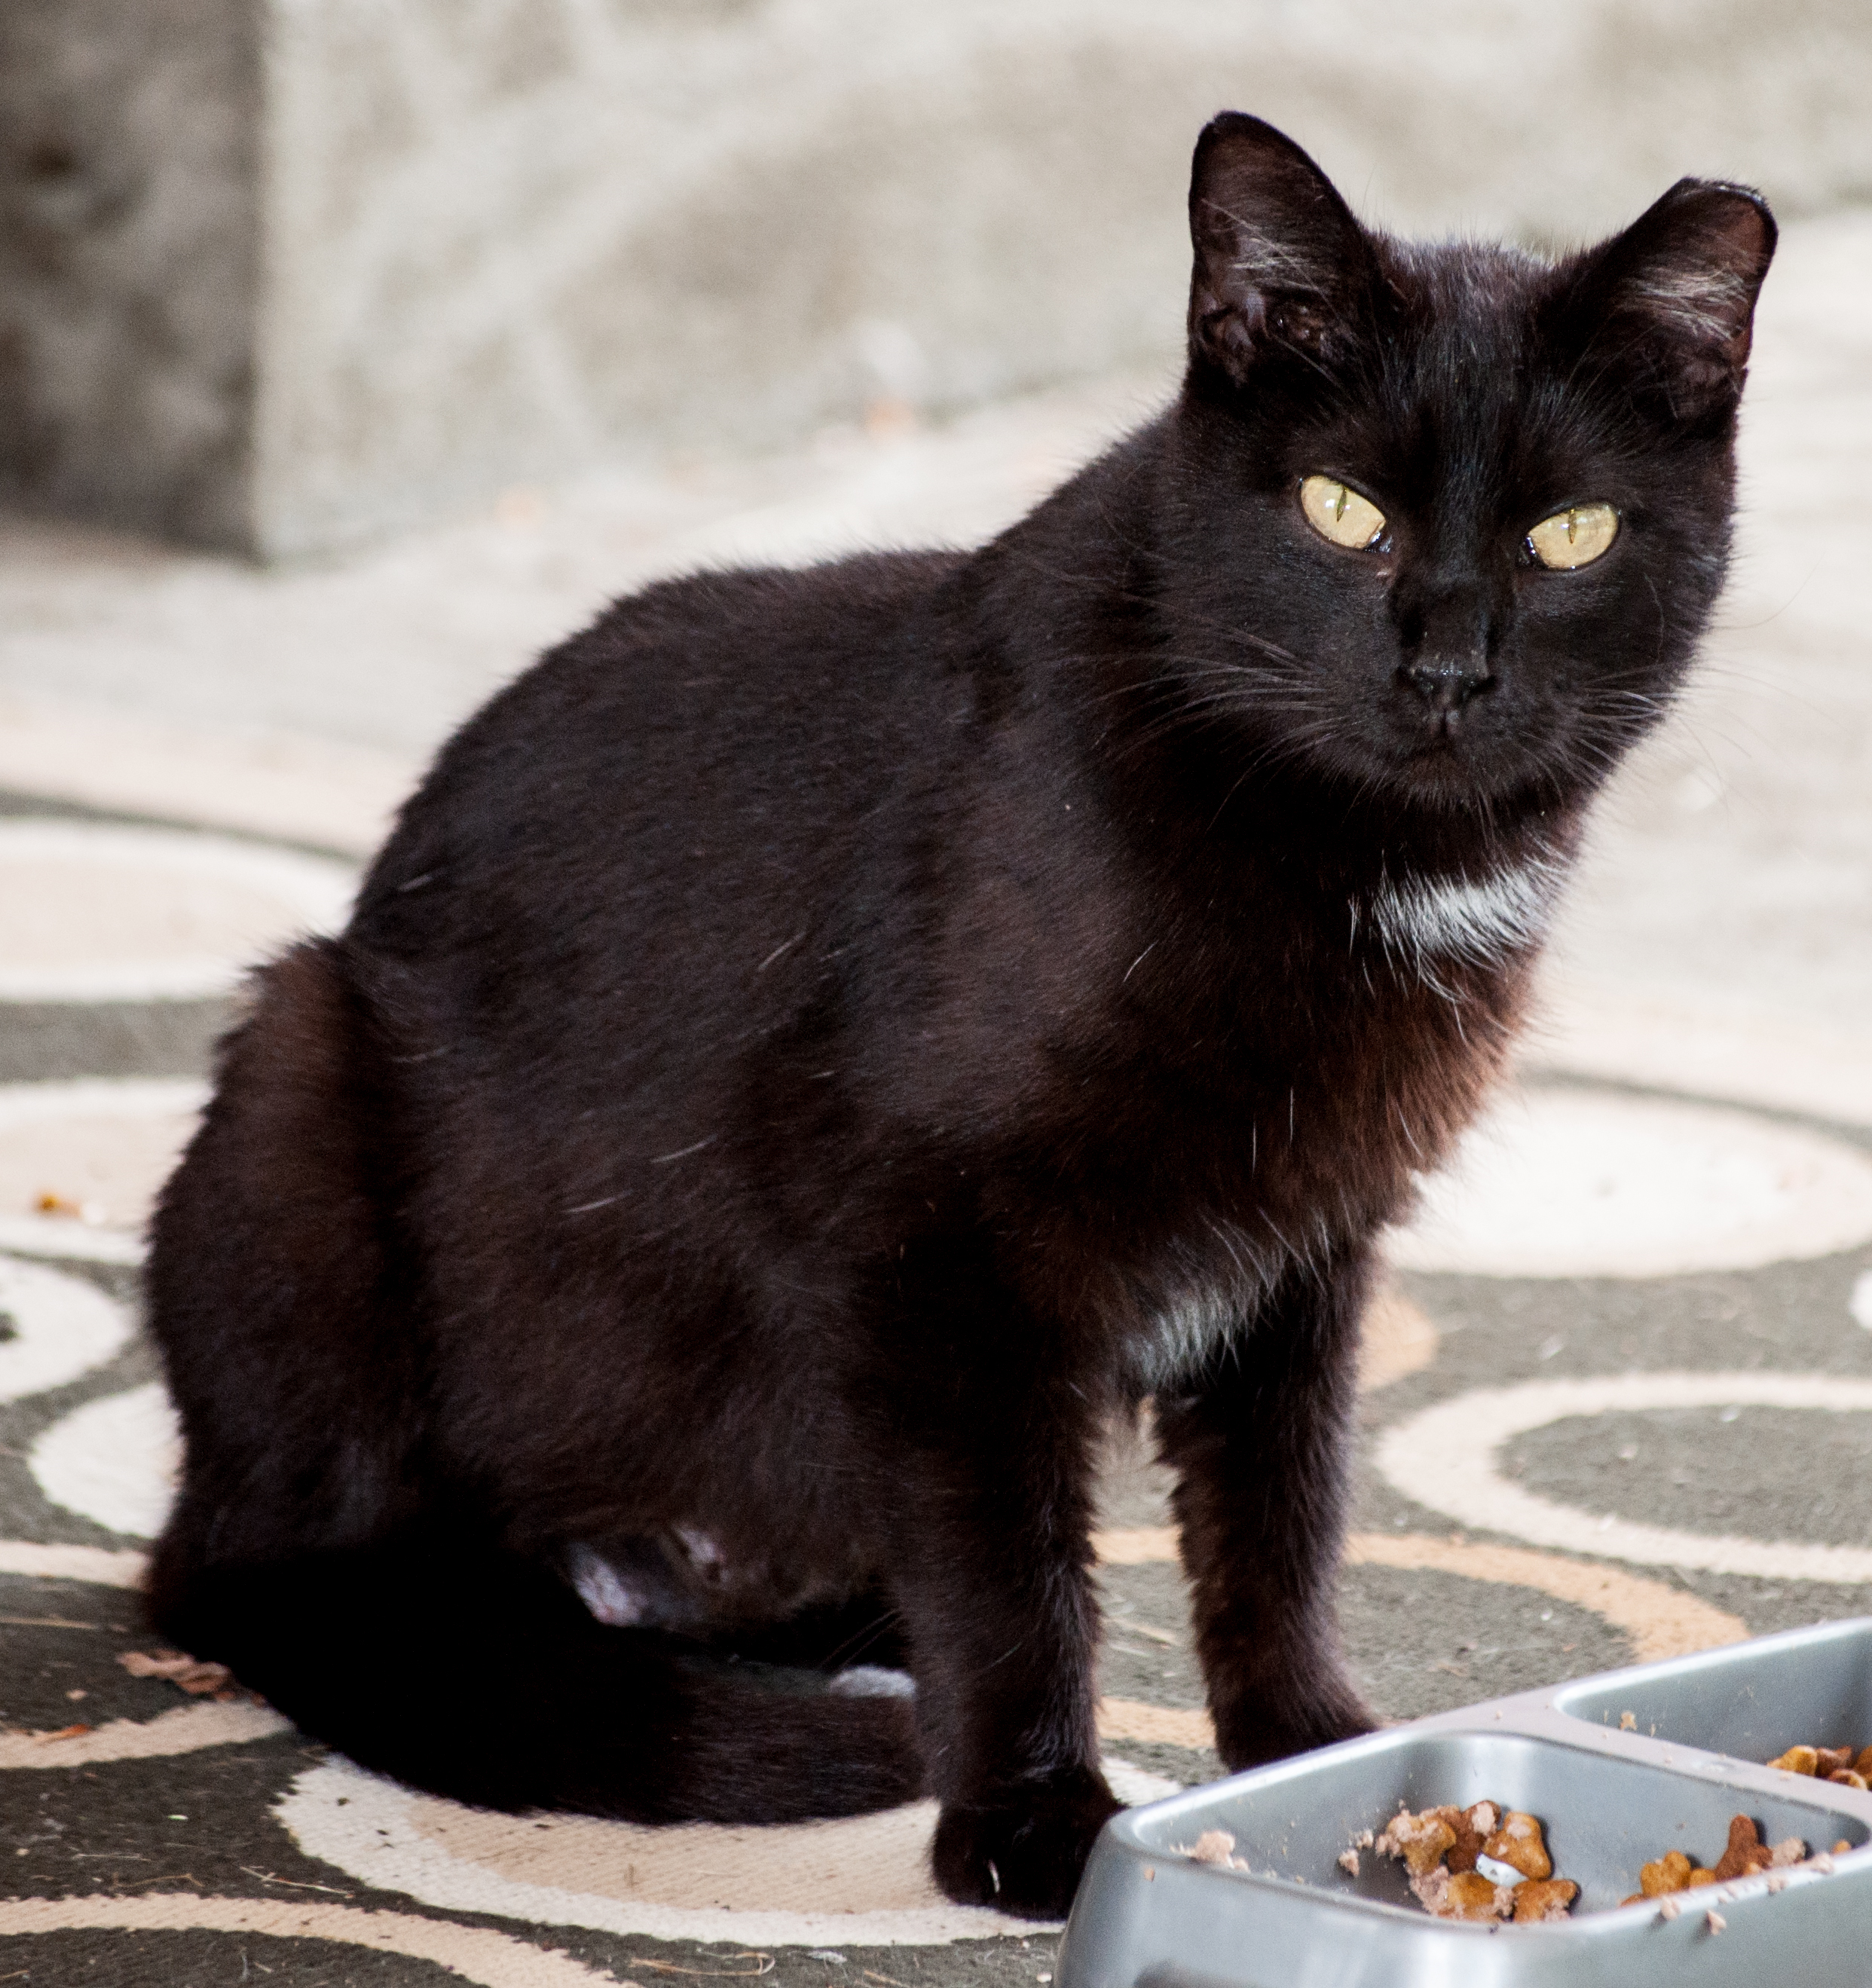
Last winter a very thin small black cat kept walking around our back yard. If you know one thing about me, I hope it is this. I cannot let an animal starve, and this animal was clearly there. We feed 2,000 pounds of corn to deer every year for the same reason. When I was a kid, my dad explained why we have to have deer hunters. He said if we did not, the herds would get too large and either the deer starve, get hit by cars, or are hunted to keep the population in check. I always thought there should be another option…so when Rich and I got married and bought a house that was backed by woodlands, we decided on what we’ll call “the new plan.” We found a farmer who sold us corn and every year, like clockwork, the day after Thanksgiving, we buy our “deer corn.” We’ve fed deer for over 30 years and are happy to do so. So when we saw this small starving feral black cat, we had to do something. My girlfriend gave us a cat house and filled it with straw.. Not hay, as it gets gross…Did I know that before, no, but now I guess I’m a cat lady. She/he used it a few times in really cold weather (we live in what’s called the snow belt, where we get a lot of snow, and it’s cold for up to 7 months a year.) We started buying cases of wet cat food and big bags of dry food for it. It wasn’t starving or freezing on our watch.

We didn’t want to name him/her as we didn’t want to bond with it, so we called him/her “Your Cat.” So if you came to visit us, we’d say “your cat’s outside” hoping someone would take him/her home with them.

Then later this spring, a large gray cat showed up, also starving, and we started feeding him as well. We knew he was a male because we saw him back up to a wall and pee. One afternoon, we saw him mount our little black cat and decided she was a female, but we’d have to wait to know for sure. Both cats were feral and wouldn’t let us near them, but over time the small black cat was getting closer and closer to Rich, his feeder. We’d been feeding her consistently for at least three months, and decided we should get him/her spayed. We have a local group called Hog Heaven Animal Rescue, where they spay and neuter cats, give them their shots, deworm them, give them a month’s flea and tick medicine, and cut their nails for $105, which is a bargain, all things considered. To trap a feral cat, you use a humane trap and put their food inside. They eat, you close the door and have to immediately cover the entire cage with a cloth, as cats will try to hard to escape, they can actually harm themselves.

Unfortunately, the very first day our little black cat let us pet her was also the day we had to trap her, and it was heartbreaking. We waited until she had finished eating before slowly closing the door, and then she went nuts, trying to break free. We couldn’t get the cover on it fast enough, as by then I was already crying from her panic and the need to escape. I thought people were making it up when they said cats will actually try to kill themselves to escape..I was mistaken. With the cover on the cage, she eventually calmed and we put her in our garage in a safe spot to be spayed the next morning. It was a bad week, as we had to euthanize our beautiful Bella, our almost 13 year old golden retriever the Friday before the cat’s surgery on Wednesday. I told Rich that if the cat turned out to be a girl, I was going to name it, but wouldn’t tell him the name. Bella was Rich’s dog in every way and I think in some way, Bella sent this little black cat for Rich to love and I wanted to honor that love.

Everything went well with the surgery, but when we went to pick her up, they said she tested positive for lactation, meaning, she had been nursing kittens. They asked had she gained weight, no…had she been missing for periods of time, no…well they’ve had false positives before so that must be what it is. They said keep her in a safe place for up to two days so she could heal and get the anesthesia out of her system, so we did. That was May 18th. On the 17th in the evening, we caught her, and then didn’t release her until May 20th. If she had kittens, which we truly believed she did not, they could never have survived for almost four days without her.

She forgave us for the surgery and subsequent jail time, and became more and more friendly, especially with Rich. She’d follow him around our back yard and rub his legs for attention, and nip him when he didn’t rub her as much as she desired. He never had a cat, so when a dead mole showed up on our back patio, he didn’t know it was his first gift of love from his new girl. I named her Ella after Bella and Rich calls her Ellie and is smitten with her, just like he was with Bella, which makes me so happy as he was devastated by her loss. Ella made Rich want to sit on the patio and rub her until she tired of him, and that didn’t happen often. She’d come to the top of the steps and look through the door’s window to see if he was coming out soon, and if he was bringing food, and boy can she eat. She never seemed to gain any weight, but was eating two full cans of cat food a day plus a lot of dry food and cat treats. We kept telling ourselves she was just wormed with her surgery, so she was finally gaining the nutrients she’d lost all this time from worms and a diet that wasn’t consistent before we started feeding her.

And then came Father’s Day. I was standing in our bedroom and Rich whisper/shouted for me to come to the sunroom as fast and quietly as possible. Of course I was too late. I said “what am I looking for?” He said “Kittens!” Our sweet little black cat brought Rich two little fuzzy black/gray babies and was so proud. We don’t know where she had kept them before now, but since this was now her home, she moved them to our covered patio behind a huge Rubbermaid storage bin and when we would sit on the patio, she’d call to them and they would come out to be with her. They are truly miracles, as they are still nursing and yet they lived for almost four days without her or any food while she was being spayed. We’ve only had them in our lives for a couple of days, but it seems like much longer, and now the process begins to find someone worthy of these two little miracles. Someone who will love them, keep them in their home and most importantly, spay or neuter them.

We had arranged to have the gray cat neutered as well, but he (like a lot of deadbeat dads) hit the road, and we haven’t seen him since making his neuter appointment. If he ever comes back for any length of time, we’ll definitely get him neutered as well. He’s not our priority though, Ella is. And to honor her and the sacrifices she’s made to keep her two miracles alive, we have to find someone to love them like we love their mother.

We haven’t celebrated Father’s Day since losing Rich’s dad a few years ago, but Ella knew exactly what Rich needed to start to heal from losing Bella, to fill his heart with new love, and for that, I can’t thank her enough.

You never know the difference a day can make, or a small black feral cat named Ella. Here are photos of Ella and her miracle babies.