Category: Uncategorized

8/14-8/18/2020

Garage sales weren’t great, but I did find a new camera bag for Rich, that he desperately needed, so that’s a bonus.  After we were finished, my girlfriend, Rich and I, went out for lunch to a place that’s only open during summer months, and had lunch on their picnic table.  They’ve done a great job of social distancing, and we were the only ones in that particular area, so we were relieved we didn’t have any concerned…Then we went to an Amish farm that has an entire field of sunflowers.  Rich has been wanting to photograph them, and he did.  I’ll try to post one of his photos once he’s happy with it.

Saturday, our college friends invited us to their house for dinner.  There were three couples, all of us going to the same college.  It’s been important for all of us to stay in touch.  Most of the men in the group graduated with me and played football with Rich. The wives and Rich graduated together, so we know all the same people and the same stories.  It’s amazing though, how much we’ve forgotten about things in forty years.  Forty years…it sounds crazy to me that I graduated in 1981..It seems like it was just yesterday that I saw those men for the first time.  I can vividly remember it too.  They all played football together, and for some reason, they decided (as a large group of freshmen) that they should shave their heads.  Our closest friend was in a lot of the same introductory business classes with me, and he always wore a vintage aviator cap..it looked something like this.

Old Pilot / Aviator Hat Stock Photo, Picture And Royalty Free ...

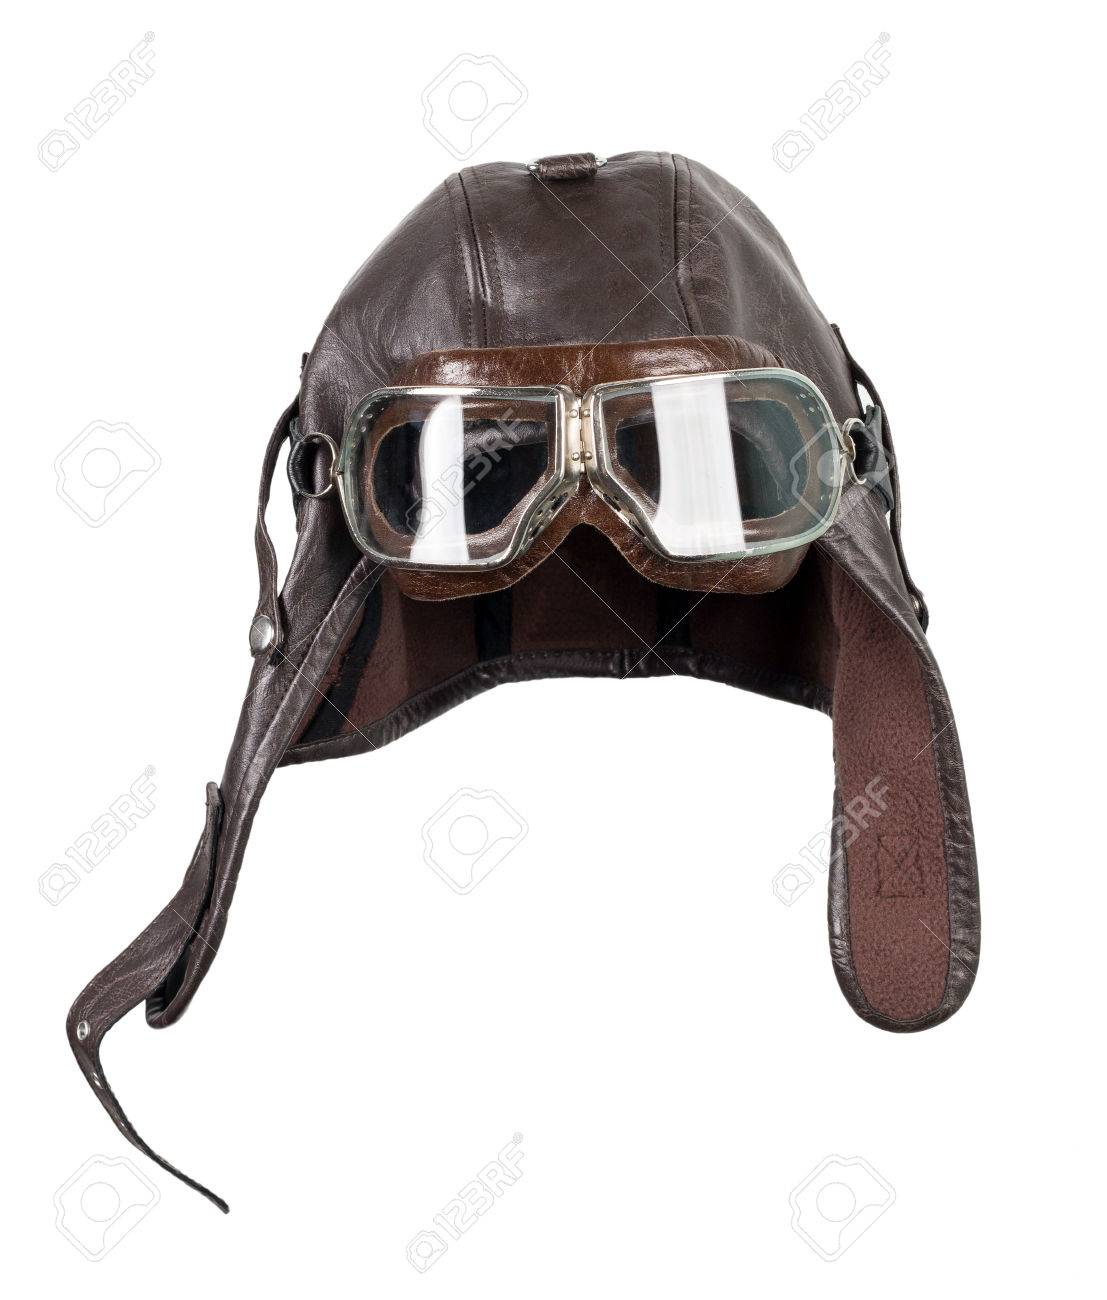
I’m not sure why he chose this particular look, but it definitely was memorable.  His hat didn’t have glasses on it (that I can remember, but maybe it did.)  I remember him wearing that hat to every class and thinking how cute it was.  He and I spent a lot of time together our sophomore year, trying to get through Intermediate Accounting together. At the end of our sophomore year, he decided he wasn’t cut out to be an accountant, so dropped it as his major, and stuck with Business Administration alone.  I thought I wanted to be an accountant until my senior year, when I had my internship, and did taxes (by hand, no computers back then,) and I realized I’d never make it as a CPA.  I did think I’d like to be an internal accountant, and one firm promised me a job, but went bankrupt before they could offer it to me.  Lucky for me, as I probably wouldn’t have liked it anyway..I think I was always cut out to be a banker.  I love interacting with a lot of people, and accounting wouldn’t have given me the chance.

Back to our friend.  After college, he worked for International Harvester, collecting from farmers for their farm machines they’d bought from IH…He hated it.  One day, a friend said he was going to take a test to be an Air Traffic Controller (this was at a time when the government had basically fired most of their controllers, so lots of positions were available.)  He said “why not?”   He passed the test, but his friend did not. These things happen, and they suck…but that’s life.  He spent the rest of his career as an air traffic controller based close to DC, and has a gripping story about 9/11, when they were watching planes fly off of their grid to NYC and DC, not knowing where they went, until they heard from air traffic on the ground, and then how hard it was to get every plane in US air space to land in the hours after that.  He was extremely proud about landing all of the planes in US air space, literally thousands, in a very short period of time, and doing it safely.  I can’t begin to imagine the pressure he endured that day, while dealing with the knowledge that planes had just killed so many people..  I sometimes wonder if people today had a clear memory of that day, if we (as a nation) would be so divisive.  I know anyone over the age of 35 should have that day etched into their memories, and could tell you where they were most moments of that day and the days that followed.

My friend had a story about a neighbor that somehow walked home from the Pentagon, (many many miles away) wearing one shoe, and having no recollection of how she’d gotten there.  It was a horrible day for America.

In case you wondered, he and I were never romantically involved, but stayed good friends through college and after.  He and Rich played in 3 on 3 basketball tournaments after college and into our 40’s, as he lived in Maryland and we lived in PA, so not a lot of chance to spend quality time together.  A few years ago, he retired, and decided to move back to our area, as his family is from Pittsburgh and his wife’s from Erie.  They moved about twenty minutes from the college we all attended, and live about an hour from us.  When I talk about going to movies with friends, we always go with he and his wife, and love spending time together.

We had a great evening with friends, Saturday, and got home in time for thunderstorms, and Honey.

Sunday, a close college girlfriend of mine, came to visit.  We spent part of the afternoon together on our patio, social distancing…(I forgot to mention that we social distanced the day before as well..)  It was great seeing her in person, as we normally zoom every two weeks to stay in touch.

Monday I went to the dermatologist to find out how he wanted to handle the Basel cell carcinoma on my cheek.  He’s decided to use drops that you put on the spot twice a day for a month, but I can’t start using them until October, as you absolutely can’t get sun while doing this process. I’m glad they aren’t cutting a big chunk out of my cheek, like they did with the top of my head, as I have enough marks on my face, specifically, two indentations from neck surgery that involved me wearing a halo that bolts into your forehead.  They aren’t really pretty, but Rich says they’re hardly noticeable (not to me.)

I need to get into my craft room to continue organizing it, but I’m just not up for it.  I decided last night that I needed to do a round of prednisone to try to get my arthritis under control.  I have no ambition and don’t feel great, and it was time.  So I’m hoping in the next few days that I have more to report, and that I make some progress in organization…At least that’s my plan.


8/11-8/12/2020

If you’ll remember, I went to the dermatologist last week and he biopsied one of the spots on my cheek.  It didn’t look bad, but for no reason, a couple of weeks ago, that spot bled…and that’s weird.  I never know what to expect after a biopsy, and this one came back with Basal Cell Carcinoma.  It’s the most common type of skin cancer, and it was the same type I had on the very top of my head.  If you want to read about it, here’s a link for you.  https://www.skincancer.org/skin-cancer-information/basal-cell-carcinoma/

The other two spots that were frozen were very small, but I found myself touching those spots for no reason.  They didn’t hurt or itch, but I’d find my finger touching them enough that it made me have the dermatologist check them.  My gauge for what’s concerning and what’s not isn’t the way moles or spots look, although that is a part of it.  Mine have never looked like the spots in the pamphlet the doctor gave me.  The clues I use for having the doctor look at certain areas are these:

  1.  Is it weird looking to me (it doesn’t look anything like the spots in the doctor’s pamphlet though.)
  2.  I touch the spot for no reason.
  3.  It’s raised.
  4.  It gets a scab or bleeds for no reason…that’s what happened on the top of my head and my cheek.

I want to make sure everyone that reads this knows that skin cancer is really common in light skinned people.  If you burn instead of tan, you’re more susceptible..

I have an appointment to discuss the options on how to handle my cheek’s issue on Monday and I’ll let you know how it goes.

As for Rich, luckily his bone scan didn’t show anything wrong with his knee or thigh, so they are sending him to physical therapy.  The surgeon said he has no idea why Rich’s knee and thigh hurt so much.

I’m relieved it’s nothing to worry about.  We have our hands full with all the things that happen to me.

Fun Pop Up Cube Card

I saw this card on Dawn’s Stamping Thoughts and thought it was adorable..

To make a pop up cube card….

I used one piece of 12 x 12″ white cardstock and trimmed 1/2″ off one side.

Put the paper in your score board on the 11 1/2″ length and score at 2 3/4″, 5 1/2″, 8 1/4″, and 11″.

Using your paper trimmer, put the paper in the trimmer on the 12″ length, and cut it at   9 1/4″, 6 1/2″ and cut, and then cut at 5 1/2″…You’ll have a 1″ piece that you won’t need.

You’ll need 12 pieces of each of the following:

2 1/2″ x 2 1/2″ colored cardstock

2 3/8″ x 2 3/8″ silver (optional)

2 1/4 x 2 1/4″ white…six you’ll need to decorate and six will be plain.

You don’t need to do the silver layer, it’s optional.

I used two stamp sets: Winnie and Walter You’re So Tweet

Inspired by Stamping Birthday Sentiments

I colored four images from the You’re So Tweet stamp set with alcohol markers and stamped two sentiments all on the 2 1/4″ x 2 1/4″ squares.

You’ll need one more small sentiment. I chose Happy Birthday…

You’ll also need: Two pieces of white cardstock that are thinner and shorter than your sentiment..In my case, my sentiment was 1/2″ tall and about 1 3/4″ long, so my two strips needed to be 1/4″ tall x 1 1/2″ long….You’ll fold these two strips in half and later I’ll give you more information on these.

Taking one of your 2 3/4″ strips you cut, fold all of your scores and then put tear tape on the outside of the 1/2″ scored area…then fold your box with that strip inside the box. Do the same to the other 2 3/4″ piece as well as the 5 1/2″ piece. Next, you’ll want to take the 5 1/2″ box and make sure the glued corner is facing you.

Take one of your smaller boxes and flatten it and make sure the glued end is facing you (in the center) then glue the bottom half of the back of it to the bottom half of the bigger box on either the left or right side. Do the same with the other small box, on the side you didn’t glue the first one to..

Next, glue all of your images and sentiments to the squares of the box. I used Plus Corporation Heavy Duty Tape Runner to adhere mine.

The plain squares you’ll put two inside the top, the back of the 5 1/2″ box and you’ll put two inside the 2 3/4″ boxes, facing you, and two on the bottom of the inside of your 2 3/4″ boxes.

Then you’ll get your Happy Birthday and two white small strips…on the small strips, put tear tape on half of the strip and wet glue on the other half (the same side)..do that to both strips…then put one strip folded in half with the wet glue facing inside and lay it inside the center of the two small boxes..hold it until it sets up..it should be a flap that sticks up…do the same with the other strip on the other side, then lay your sentiment on the strips and make sure it’s even and centered..

It will fit into a 6 x 6″ envelope..

Fine Tip Glue Applicator Decorated Pin..Never Lose Your Pin Again!

To make a fine tip glue applicator pin attachment (so you don’t lose your pin)…

You’ll need a 30mm  .7mm 21gauge 304 Surgical Stainless Steel (silver color) Eyepin Eye Pin link: Ebay: https://tinyurl.com/y6ft23m3

You’ll also need a 2″ long flat silver head pin (Link: Ebay: https://tinyurl.com/y5gm742o)

Pliers and round nose pliers and wire snip.

Ebay 4 in 1 tool. Link: https://tinyurl.com/yxqa4rol   (Cheaper than Walmart version.)

or a three piece tool kit on Ebay, link: https://tinyurl.com/y5bmlb37

or a kit like the one I bought at Michaels, link: https://tinyurl.com/wlua8xp

Beads..I recommend you going to your local craft store and find some smaller beads as well as one larger bead to make one pin….or look through your old earrings to find dangle earrings that you no longer wear, or one that you lost the match to..

4mm silver jump rings Ebay link: https://tinyurl.com/y6jzzrdb  You won’t need these if you don’t want to add additional dangle, as you’ll be creating one loop with the head pin.

Start by taking your 2″ long head pin and adding your beads to it, then about 1/8″ from the last bead take your plier and make a bend in the pin, then turn the wire in the opposite direction and use the round nose plier to create a loop and snip off the excess wire. I like my decorated pin to dangle, so I add two jump rings. To do this, simply using your pliers bend one side of the opening away from the other…Don’t spring the opening, just bend it away from the other side as I show in the video. Then close the opening once it’s been woven through the loop you created. Do the same to the second jump ring, but don’t close this one until you’ve also added the surgical steel head pin to it as well. Then close the jump ring and your pin is ready to go into your glue bottle.

8/7-8/10/2020

I’ll be honest…I’ve spent the end of last week in doctors’ offices, so didn’t accomplish much in the way of craftiness.  I have really light colored skin, and back in the 1960’s and 1970’s, sun block wasn’t available.  I remember I had Coppertone SPF 4 while I was in college in the late ’70’s, and my girlfriends wondered if I was trying to remain the whitest person in America.  SPF of 4, seriously?  Today, most woman are using SPF 15 in their daily moisturizer, and up to SPF 100 for a serious summer outing.

The end result from a childhood spent without sun block, is that I struggle with spots on my skin that are irregular.  I’ve been given the pamphlet on what skin cancer looks like, and my advice to you, is don’t use that as your benchmark.  If you have a spot of skin that seems weird to you, get it checked out.  I’ve had so many spots removed, and many of them pre-cancerous, and one big spot on the very top of my head that was  skin cancer  (I know, you think my scalp would have been protected by hair, but the sun doesn’t stop for hair, it burns right through it.)   I had to have some major repair for that spot, and now there’s a small spot on the front of that area that needed to be frozen…And I had a spot on my face that needed to be biopsied and another spot on my face that needed frozen and one on my forearm that also needed frozen, as both appear to be pre-cancerous.  I’ve had a lot of biopsies, and they don’t bother me, as the doctor numbs the area and removes the spot.  I’ve never had anything frozen before, and definitely not on the top of my head.  The dermatologist warned me that freezing my head might give me an ice cream headache and he wasn’t kidding.  I normally wiggle my toes when something hurts from a procedure, but my whole foot was moving….Ice cream headaches never hurt like that.  I think it hurt more than normal because it was freezing over the scar from the first procedure… But then he moved on to the spot on my face, right above my eyebrow.  It was a small spot, maybe the size of a pin head…He froze it longer than I anticipated, then moved onto my forearm.  That spot was roughly the same size as the one above my eyebrow, but didn’t hurt nearly as bad when he froze it.  Once he was done, the spot above my eyebrow still really ached, and it felt like a terrible sunburn.  When we left his office, I really wanted to put something cold on it, as it was the only one that hurt.  You’d think the one on top of my head would be the one to hurt, as he froze it the longest, but apparently the hair protected my head a little (at least that’s what I’m telling myself.)

Of course I was whining a little and Rich said “Let me see it…”  and when he looked at it, he was surprised at how red and swollen my forehead was.  By the time we got home, I needed an ice pack on it, and within the next hour or so, I had a big blister there.  I’m not talking the size of a pin head, more the size of a dime…and it’s really raised and full of fluid, so I’m worried about it breaking open and not healing.  Yeah, I’m that kind of worrier.  I called the dermatologist today for a prescription refill and mentioned the blister.  They immediately called back and said I should come in to have it drained, so I did.  Now I’m sporting a huge gauze patch (above my eyebrow) and a band-aid (on my cheek) and look like I’ve been in a car accident. I told a man we know that Rich pushed me down some stairs, and he snickered and said he figured that’s what happened.

On the other hand, I had the open wound on my tongue that hasn’t been healing and went for the second follow-up appointment with my oral surgeon.  On my last visit, he’d prescribed a mouth rinse and it works perfectly to assist in healing the spot.  This was the first time the oral surgeon didn’t look perplexed when looking at my tongue, and said it looked like it was finally healing.  He said he didn’t think the rinse had anything to do with it healing, but said he thought it was because I was taking less prednisone (a steroid I take for my arthritis) and that was why it was healing.  Regardless of the reason, I’m thrilled it’s finally healing…  After all, it’s been over six months now, and that’s long enough to have a boo boo like that…in my opinion.

And that’s how my week has gone…some weeks are better than others.

8/2-8/5/2020

The impossible has happened…..I finished making our great niece’s college album!  I know, it’s shocking!   It was truly a labor of love, and it is huge!!  I can’t believe how much it grew in the time it took me to make it.  It just kept getting bigger and bigger..I can’t wait for you to see the video.  I decided to only put bits and pieces of the making of the album into the video, otherwise, you’d be watching a video that would literally be hours long, and let’s face it, I can’t imagine anyone wanting to spend that amount of time watching a video.

In the last couple of days, I made some fine tip applicator decorated pins.  I always lose the pin that you jam into the top of fine tip applicator bottles, and that makes me crazy.  I’ve seen people selling them for (more than they should cost,) so I decided to make my own.  It was so simple, and I made a video walking you through the process.  I didn’t make a huge dangle (as a lot of people do), as I just wanted to be able to find the pin.  Mine are like a large dangle earring, simple, but easy to find.  I made one for my friend Rebecca from Rubber Stamp Tapestry, as she said she loses her pins but doesn’t like the idea of a big beaded dangle….So I used sea inspired pieces, and hung a sand dollar, a sea shell and a piece of sea glass to hang from that pin.  I hope she likes it. (At least she won’t be losing her pin now.)

Since I was playing in my jewelry making supplies, I decided I should organize them, and boy did they need organizing.  It took me several hours, but I also got sidetracked and made a bracelet and some earrings while I was organizing.  I can’t just do one thing, because it’s more fun to do a few things at once.  Either that, or I’ve got ADD, and I think it’s more that I like multi-tasking.

Did I tell you about the hole in the side of my tongue?  I had a tooth that rubbed a pretty significant hole in the side of my tongue, that just didn’t want to heal.  When I went to the dentist, six months ago, he noticed it, and wanted me to see an oral surgeon about it.  I made the appointment to have the tooth ground down so it wouldn’t rub my tongue. It just so happened the appointment was two days before everything shut down for Covid.  I didn’t get another appointment with them to follow up, until July…and things hadn’t really healed, even though my tooth was no longer an issue.  The oral surgeon was concerned it might be cancerous, but knew I was on steroids for my arthritis, and that causes slow healing.  He was considering doing a biopsy, but said biopsies often don’t heal for up to two years….TWO years?  Oh, and he said sometimes the stitches rip open and you have a big gaping hole in the side of your tongue.  No thanks….So I asked if there was any kind of medication I could take and he suggested a mouth rinse.  I don’t know what was in that rinse, I’m assuming fairy dust, because I started using it less than a month ago, and already my tongue looks a million times better.  So much time has passed, that my next six month dentist appointment was earlier this week, and my dentist was really happy with the way it looked.  I went for a follow-up with the oral surgeon this morning, and he looked relieved…but doesn’t think the rinse caused it to heal, he just thought it was from not taking as many steroids.  I guess I can understand why he’s thinking that, but it’s pretty coincidental that my tongue only started healing once I used the rinse… I’m no doctor, but it seems fairly likely that the rinse had something to do with it.    Just my two cents on it.

And best of all, the oral surgeon says I don’t need to see him again unless it stops healing.  He still thinks it will take up to another six months for it to completely heal, as tongues are notorious for healing slowly.  I’m just relieved it’s on the road to recovery.

Making a New Size Card, Using a 6 3/4 “Personal” Envelope

I bought a box of envelopes at the Dollar Tree link: https://tinyurl.com/y4569olb for sending letters, and realized we don’t seem to use these envelopes in card making…And why not? I’m not sure.  The envelopes are much cheaper than the A2 size envelopes and 6 x 6″ card stock pads are perfect for layering on these card bases….so let’s give this a try.

I took the larger die from InLoveArts.com (Double Circle Dies Link: https://bit.ly/34LwhBT) and die cut the circle.  I cut matching apricot colored cardstock from Stampin’ Up (retired color) and cut the card base to 6 3/4″ across scored at 3 3/8″ and 6 1/4″ tall.

I cut the origami paper that I got from InLoveArts (link: https://bit.ly/3binny9) to 3 1/8″ x 6″ to line the card base.

I stamped from the “Congrats” die and stamp set from Hero Arts link: https://tinyurl.com/yyooxj57 the words “on your graduation” in Stampin’ Up’s retired Only Orange die ink and then used a Distress Ink marker to make it darker, then I added clear embossing powder and heat set it. I die cut the “Congrats” out of white cardstock and then used Black Enamel Accents (link: https://tinyurl.com/yy4b8l2y) from Ranger to make Congrats shiny and raised. I folded the apricot circle die cut around the card base and used Plus Corporation tape runner (link: https://tinyurl.com/y4js94uz) from Amazon to attach it to the card base. I used a Zig 2 Way Glue Pen link: https://tinyurl.com/yxo3qzzn to add glue to the tiny outside lines of the circle.

I used Martha Stewart’s Birds on a Wire border punch (retired) link on Ebay: https://tinyurl.com/y596855a on white cardstock and used a length of it for inside the card.  I added washi tape to the envelope and glued a row of the white punched birds on top of the washi tape. Make sure it’s well adhered or it will come off while going through the mail.

7/30-7/31/2020

I decided I need to get rid of some of the things I don’t use, and probably never will.  I could sell them on Ebay, but that’s so much work, that I decided to put them on Splitcoaststampers.com.  It’s a lot easier, and there aren’t any fees involved, but there’s a much smaller audience.  So I listed a bunch of border paper punches and corner rounders and all-over-the page paper punches, as well as a ton of retired Stampin’ Up cardstock.  When I first started stamping, I went on Splitcoaststampers and bought a lot of retired colors of cardstock that I really liked.  I don’t know what I was thinking, but there’s no way I could ever use this much paper.  I’m seriously over-the-top with cardstock.  The colors are great, but you can only use so much 8 1/2″ x 11″ cardstock.
I wasn’t sure how much to charge for the cardstock, so based it on what another seller is charging for hers, but I think it must be over-priced, and I’ll reduce the price in a few days.  (I feel kind of dumb, changing the price in the first couple of days that it’s listed.)  What advice do you have?

On a less than happy note, Rich had his hip replaced last Halloween, and felt terrific until January…Since then, his thigh and knee have been hurting and they can’t seem to figure out why.  The surgeon injected his knee with cortisone, and that didn’t help.  He said he’s doing one test/procedure at a time to try to eliminate what’s not wrong, since he doesn’t know what is wrong.  So this morning, at 5:45AM (can you believe the timing), Rich had an MRI.  We’re not sure what that’s supposed to eliminate, but I’m hoping one of the tests he has done will reveal what is wrong.  Rich says it feels like tendinitis, but the surgeon doesn’t think that’s it.  It’s really frustrating for him, and I’m hoping it starts to feel better soon.

I went to a bunch of garage sales this morning, and the crowds were unbelievable.  This summer, there haven’t been a lot of people at garage sales, but today, every sale we went to had at least ten cars, and that’s a lot for around here.  I’m a sucker for little kids selling anything, and today they were selling “monster bars,” that were like a chocolate chip cookie with M&M’s instead of chocolate chips, and cut into bar shapes.  They were still warm out of the oven when we bought them….You can’t beat that.  The house was four houses away from ours, and if Rich hadn’t been back in bed to make up for his early morning, I would have brought one home for him right then…Instead, my girlfriend and I ate ours before we made it to the next sale. (Sometimes you have to take one for the team, haha) The only other thing I found, were sofa and loveseat dog covers for furniture.  I’ve bought several sets of them from stores, and the backing always seems to fray.. I think it’s because I wash them so much, because I don’t want my house to smell like dog hair (and I convince myself that it does, even though we are obsessive about it.)  I figured since I never have good luck with the ones I buy from stores, maybe I should try buying them from garage sales instead.  The woman I bought them from said she never used them (and they looked like it.)  I’ll let you know if the work out well or not.

Today, I uploaded the kite video that I collaborated with Rebecca from Rubber Stamp Tapestry, the pegstamps.com owner.  We both really struggled making these cards, and I was impressed when I watched her video, because she explained the layers so much better than I did.  The big issue was the card size.  The card we were using for measurements gave the wrong scoring measurement.  The length of the card (that folds in half to make two kites) was supposed to be 11″, and scored in the middle at 5″…and that’s where the problem originated.  It should have been scored at 5 1/2″, but I decided maybe the length was the problem, so I changed my length to 10″ and stayed with the 5″ score….Rebecca on the other hand, read the notes below the video, where the cardmaker said she gave the wrong score, and it should have been 5 1/2″….From there on out, our cards are sized differently because we went in two different directions.  I had to laugh because at one point, Rebecca referred to the kite as a puzzle from hell, and she wasn’t wrong.  I’m just happy I finished my card and the video, and we both decided, sometimes an easy fun fold card, isn’t as simple as it looks.

Beach Card w/ Real Sand & LillaRose Giveaway

I wanted to make a card that incorporated some sea inspired bobby pins my friend Debbie sent me. She graciously has agreed to give a $17 store credit to a lucky viewer on August 5th.

To be eligible to win, you need to go to her website and create an account with them. To do that, all you need to do is go to lillarose.biz/alwaysJOY and in the top right corner, click on “sign in” and then you’ll create an account. (No purchase is necessary to be eligible.)

Debbie Berndt’s contact information is:

Cellphone: 269-414-6090

Email: dberndt57@yahoo.com

Address: 63476 Pierson Rd Cassopolis, MI 49031

Lilla Rose link: http://www.lillarose.biz/alwaysJOY

I started with a 4 3/4″ x 6 3/4″ piece of white cardstock and a 5″ x 7″ card base. Using the  4 3/4″ x 6 3/4″ cardstock, I took blending brushes link:

Aliexpress link: https://tinyurl.com/ybxlyo8v Cost per brush: $1.43 + .73 shipping (from China)

Ebay linkhttps://tinyurl.com/y7aoxyk2 Cost per brush $1.46

and Distress Oxide Tumbled Glass with a mask I made from cardstock and cutting mountains and valleys.. I blended the inks into the card front and moved the mask and inked again. I probably inked about 1/3 of the length of the card front. I used Broken China to add more dimension to the clouds, then went to the mid section (the ocean) and colored it with Salty Ocean. I created a straight line for the horizon, and then colored straight down about another 1/3rd of the card front. I decided I wanted 3-D waves, so cut cardstock to 4 3/4″ wide by 1 1/2″ tall and then cut waves out of one, then put that image up against the other strips I’d cut, and using a pencil, traced the waves, then cut them out so all of the waves were the same. I added fun foam to the back of the waves. I used Antique Linen Distress Oxide ink and rubbed the ink pad over the bottom 1/3rd of the card stock to create a beach. I dried it then added Collage Pauge over the sand portion of the card, and then added sand to it. I should have punched out holes to put the other bobby pins in it on the card before adding sand, so if you attempt this, made sure you punch the holes out first before adding waves or sand. I die cut clouds and originally put a sentiment on the largest cloud, but didn’t like it, so die cut more clouds and laid them over the first set. To add the turtle bobby pin, I didn’t consider how long it’s “legs” were, so had to take all of the clouds off, and put the wave with the turtle on it at the top of my waves, then lay the other waves below it, cutting out the fun foam behind them where the legs of the bobby pin would go. On the 5″ x 7″ card base, I used Antique Linen distress oxide ink and rubbed it around the edges so when I glued the card front to it, the edges wouldn’t be white. I had added fun foam and tear tape to the back of the card front so the bobby pins were protected, then decided hot glue might be the best way to adhere it to the card base…and it worked. Yay!!

After I finished the video, I thought it would be fun to add a shark fin to the waves, and added inside the card, the theme from “Jaws”…Ba Da Ba Da Ba Da…I think our niece will get a kick out of it.  You can see the shark fin in the photo for the video.

The sentiment came from a Hero Arts set called Hello.

7/27-7/29/2020

I have been working late into the night for the last two nights on projects I’ve made.  The first was a card I made to fit in personal size envelopes.  They’re call #6 3/4. If you never knew where the term A2 sized cards comes from, it’s from the size of the envelope.  I guess I could have called my card a #6 3/4, but that sounded kind of weird, so I called it a personal card instead, as that’s the other name given to this size envelope.  I wanted to call it something like “short and fat” but it was neither, and since there’s already a slim- line card, I couldn’t use tall and skinny, as basically, that name was already taken.  I could have called it a little taller and a little skinnier than an A2 card, but that was just confusing to me…so, I went with personal…I hope viewers come up with a better name for it..I sure couldn’t think of one.

Then I made a kite shaped card that my friend, Rebecca, from Pegstamps.com is also making with me.  I’d seen it on Mixed Up Crafts, and had already tried (and failed) to make it twice.  I was obsessed with making it correctly, so made it for the third time last night.  The problem was two-fold.  I used heavyweight cardstock (kiss of death) and couldn’t get the folds to work properly, and the Mixed Up Craft channel gave the wrong card dimensions.  She said to make the card 11″ long, but her center score was 5″ which doesn’t work out mathematically.  So I tried scoring at 5 1/2″ (which was right), but I did it with heavy card stock so it didn’t fold right.  Then I changed the measurement to 10″ long and my score mark stayed at 5″ so the folds were right.  The thing she doesn’t show, it cutting out the kite to ensure they fold together correctly.  The way I finally made it work, was to draw the lines for the kite on one side, (it’s two kites folded in the center) then I pinched the two halves together and holding them tightly, cut out both kites at once..  It worked and I can’t tell you how relieved I was that it did.  I was up until 1AM trying to make it work.

And lastly, another 1AM night, I made a card with real sand and bobby pins of sea life attached to the card front.  It took a lot of trial and error, but I finally made it work.

I spent more time on my great-niece’s album, and now I’m down to the front and back covers and it will be finished.  Just wait until you see how thick it is.  It’s probably 4″ thick at this point, and I’m sure, after she adds her photos, that it will get thicker.  I hope she likes it.