I’m Obsessed with 3-D Projects and…

decided I needed to try to design one for myself. I want storage for my Prismacolor pencils I’ve tried pencil rolls, and my girlfriend even made some for me for Christmas a few years ago. If you’re not familiar with them, they look like this…

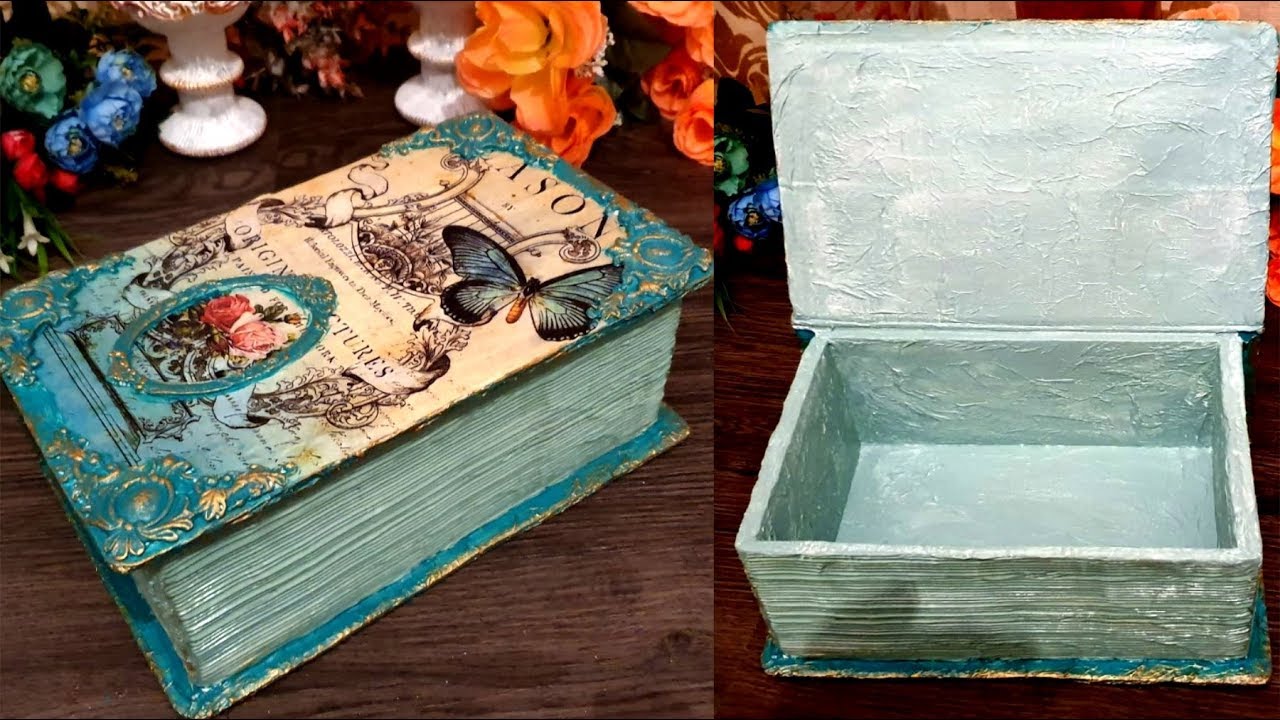
I thought I’d really like using the rolls, but I have the set of 150 Prismacolors, and I had to go through three or four rolls looking for the color I wanted, and decided that wasn’t a workable solution. So then I decided that one box large enough to hold the pencil set would be great. I even made dividers so I could put pencils in three different partitions, red/orange/yellow/pink, blue/green/purple, tans/browns/grays/black and it still seems too tricky to find colors I wanted. Here’s an idea of the type of box I used, and I just hot glued in partitions.
DIY /Vintage Box Book from recycle cardboard /CARDBOARD BOXES CRAFTS -  YouTube

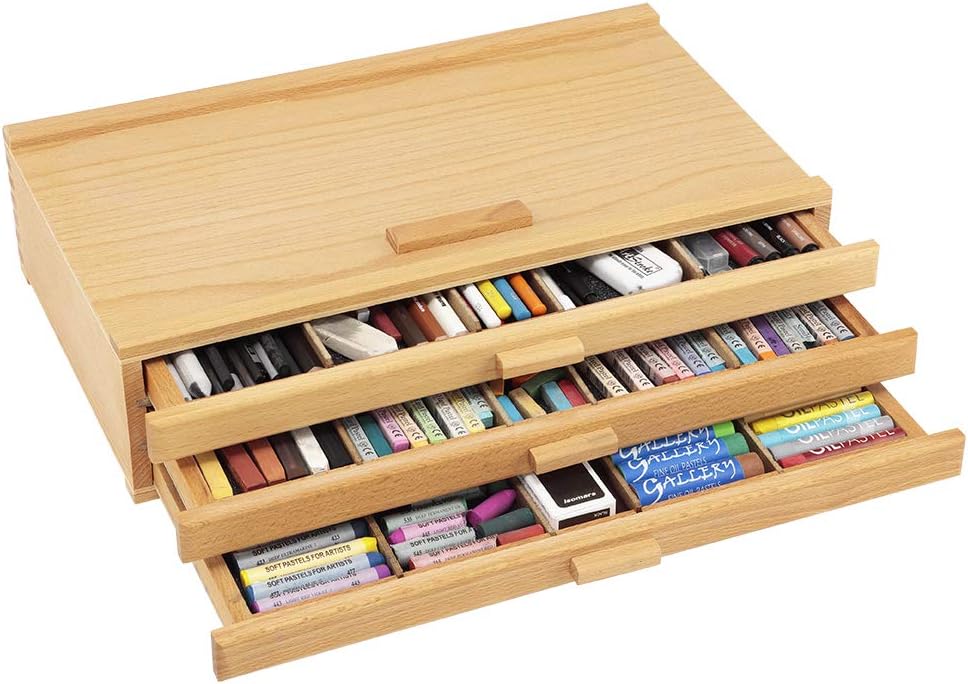
I thought about buying storage normally used for pastels, but figured if it didn’t work, I’d have to figure out another use for this. My main concern is that it won’t hold all of my pencils. In looking at these, it seems the largest number of pencils each drawer would hold would be 40 (and that number seems high to me.) So that would leave me with 30 pencils and no place to store them.
3 Drawer Wood Pastel Box: Amazon.ca: Home & Kitchen

I watched a video by Mixed Up Craft and really loved the idea of it. It’s a set of drawers that she made with foam core. I will be trying to make this project from foam core in the future, but decided I work better with cardboard, and I have to create my project from scratch, as the size I want each drawer to be, is 7 1/2 x 7 1/2″ cy 1 1/2″ tall, which is much larger than anything I’ve seen a crafter do. Plus my unit will need five drawers, each divided in half. I figure that will give me one section for reds, oranges, pinks, yellows, greens, blues, purples, grays, tans/browns and the tenth section will hold black, white and blending tools.

Beautiful DIY Drawer Storage

I worked on it today, and it will take me a long time to make. I finished one drawer and cut out a lot of cardboard and a ton of hinges to make the drawers sturdy. I’m happy with the drawer I made, but hope that eventually I can make drawers faster. Four hours is way too long to plan measure, cut and adhere everything to make one drawer. I am looking forward to the time when I can measure, cut and adhere the outer case for my drawers, and hope this storage system is the last one I consider for my pencils. I’ll be making a video showing the project, but won’t be doing anything until I can make a drawer rather quickly, and then I’ll make the outer case for the drawer so you can make your own. I have to say, if mine turns out anywhere in the neighborhood as cute as the one Sam Calcott (Mixed Up Craft) made, I’ll be thrilled.

Repairing a Self-Healing Cutting Mat Used to Replace a Plate in a Die Cutting Machine

A year ago, I replaced the bottom cutting plate for my Vagabond with a cutting mat from the sewing section of Hobby Lobby. The one I bought was small, 6 x 8″, and here’s a link to one. https://tinyurl.com/pbdr66uf

Here’s a link to the original video showing how I cut it down to fit my Vagabond die cutting machine. https://www.youtube.com/watch?v=6oZ0e4lm_XM&lc=UgwnKe4rccc7rJy0o2x4AaABAg

The thickness of your cutting mat is really important, and when I was done, my mat was slightly thinner than I needed it to be, so I added a chopping mat from Dollar Tree that I adhered with tear tape to the bottom, and have never needed to replace or re-glue in a year’s worth of serious usage. Link to chopping mat: https://tinyurl.com/2d45nz86

After a year’s worth of using the replacement “cutting plate” that I made, it was getting a lot of cuts and paper fibers caught inside, so I decided to “refresh” it. You’ll want to thoroughly clean your mat with a mild cleanser. I used a combination of baby shampoo 1 1/2 tsp. to a spray bottle of water. I use this to clean everything in my craft room, including my stamps. I had to use a scrub brush to really clean it, and to remove the paper fibers that were stuck in the mat surface. Link: https://tinyurl.com/ctr7uadc After the mat was well cleaned, I covered it with a damp/wet towel that I laid over it and kept that way overnight. You don’t want to use hot water as cutting mats don’t like heat or sunlight, so also keep it out of sunlight. I made sure the towel was damp enough that it would stay wet overnight. In the morning, my mat had healed almost all of the cuts and after a year of using it, it was ready for another year.

NOTE: You can place your mat in a sink of room temperature water, but I was afraid if I did this, since I’d cut the original mat on the sides, and adhered the Dollar Tree chopping mat to the underside, that the water would seep into the sides that I cut, and would remove the chopping mat. My system worked just as well as putting it in the sink, and I didn’t have issues with it.

The Never Ending Card, by Viewer Request

My girlfriend send me a never ending card for Christmas and viewers asked if I would give it a try…So here it is.

I made an A2 sized card, but thought it would be easier to show you how to make a 6 x 6″ version.

Start with two pieces of medium weight cardstock cut to 6″ long x 3″ tall.

Score all four pieces on the 6″ length at 1 1/2″ on both ends (by turning the card stock around to the other end) then turn to the 3″ length and score at 1 1/2″ down to the score line you just made, then turn the cardstock around to the other end and score at 1 1/2″ down to the score line.

Make sure your cardstock are exactly the same size and if they aren’t shave off to make sure they are.. Lay two of your cardstock down one above the other, making sure the long score lines run from top to bottom (vertically) and put a piece of washi tape to keep them together. Then lay the other two pieces of cardstock with the long score lines horizontal (going from left to right ) Add wet glue to the cardstock with the long scores going vertically, on the top left and right square and the bottom left and right squares. They lay the other two cardstock with the horizontal long scores on top and make sure the glue has time to set up before you fold them. Once the glue is set, fold the card open and burnish each of the folds. Open the card and continue folding each until you’re back to the front again.

Decorate with:

8 pieces 2 3/4 x 2 3/4″ You can use four of one pattern and four of another.

4 pieces of 2 3/4″ x 1 1/4″

16 pieces of 1 1/4″ x 1 1/4″ squares

I used a bunny stamp and die set that my girlfriend sent me, and unfortunately, she didn’t send me the packaging, so I don’t know the name of the set..sorry

Laying down the decorated pieces can sometimes be tricky, and I recommend you just tacking the layers down until you are sure they are placed with the pattern going in the right direction. You’ll also need to make sure that the bunnies or whatever you use as embellishments, are not only placed going the right direction, but also that you glue them into the center so you don’t see them when you’re on a different fold (if that makes sense.) You want to only see the images when you open the card to that layer.

To eliminate ink I accidentally dropped on the image, use a Tombow Sand Eraser and gently remove mark.

I stamped a Happy Easter sentiment from an old retired stamp set from Amuse Studio called For Peep Sake.

More Ideas For Mica Powders

I was sent the set of 24 mica powders from the nice people at the Hippie Crafter and I wanted to show you some ideas for using them.

I’ll definitely make another video showing additional ideas, as I didn’t want to cram too much into this video.

https://www.hippiecrafter.com/

Sadly, their mica powder is currently sold out, but here’s the link for it for future reference. It is available on Amazon and here’s the link:

Mica powder: https://www.amazon.com/dp/B08G65KP7B

https://www.hippiecrafter.com/collections/hippie-crafter-products/products/mica-powder

To make watercolor paint from mica powder:

Use the back of a foam plate or foam container to mix the paint on. You’ll need a small container to put the paint into once you’ve made it and the container should have a lid. Take a palette knife and put maybe a teaspoon of mica powder in the color of your choice, onto the back of the foam plate. Add enough gum arabic link: https://www.dickblick.com/products/da-vinci-gum-arabic/ until it is the consistency of cream. You’ll need to use the palette knife to work the mica and gum arabic back and forth until they are well incorporated. The container you choose for it should come with a lid, as you won’t want dust or dirt to contaminate your new paint. Let the paint dry and then rewet with water when you want to use it.

Yellow & Green Floral Wreath Card:

Floral Wreath Die from In Love Arts link: https://tinyurl.com/smrxpvk

I cut a piece of white cardstock to 4 x 5 1/4″ and then put washi tape on it to divide it into rows from top to bottom on the 4″ length. I painted the outside rows green, the inside two rows yellow, and the center row green. Once it was dry, I glued it to a card base that is 4 1/4″ x 5 1/2″. I cut and painted the floral wreath die cut and once it was dry, put very thin foam tape behind it and added it to the panel with stripes. I painted another piece of white scrap cardstock with yellow paint (large enough for the hello die to cover it) and when it was dry, die cut “hello” and then wet glued this to the card.

Butterfly card:

I took a goldish colored 4 1/4″ x 5 1/2″ card base and using a big butterfly I found in my stash, put wet glue on the center of the butterfly and centered it on the card. I added the metallic watercolor paints to it over the blue, red and yellow of the butterfly. I painted a scrap of white cardstock with the red paint I’d made, and die cut “hello” from it, then wet glued this to the bottom of the card.

DIY Gift Wrap:

I took a roll of brown paper used for masking when painting.. It is 9″ tall link: https://tinyurl.com/3bvja8uw Make it the length you need, then take your mica powder, plastic packaging, palette knife and Collage Pauge matte link: https://tinyurl.com/cu8vsx2h and mix the mica powder and Mod Podge or Collage Pauge together until they are nice and creamy. Paint whatever pattern you choose onto the brown paper. You could also use a brown paper bag, as long as it’s not wrinkled and it shouldn’t have writing on it.

Laminating Book Marks: Take a bunch of leaf dies and cut them out of whatever paper you choose. Then rub the leaves in embossing ink link: https://tinyurl.com/5f35nv29 or vegetable glycerin and then paint them with the mica powder colors of your choice. Next, lay them in a laminating pouch and run them through your laminator. I do this twice as they might not completely get sealed the first time you run them through.

I also made smoke by flicking mica powders in silver/black, white and a dark gray onto the center section of a laminating pouch and then laminating it. You can also paint a laminating pouch with mica powders and I showed this by painting stripes with the powders I’d used for the smoke.

You can also paint napkins with mica powder and then run the painted napkin through your laminator.

I’m sorry I haven’t written on my blog…

I really feel terrible that I haven’t kept up with my blog. I used to write something on it every day and now I wonder why I can’t find the inspiration to write any more. I must have had some good ideas, but since the year of covid, I can’t think of anything I think you’d want to read.

I’m lucky to have found a niche on YouTube and to have so many wonderful people follow my channel. Lately, small companies have been sending me craft supplies to try, and I’m thrilled by it, but I also feel badly, because so many crafty women/men don’t have the money to spend on their craftiness. So I decided I am going to do more giveaways so we can share in my good fortune. I wish I had more ways to help fellow crafters in need, like we did after the huge hurricanes that almost destroyed Puerto Rico, Texas and Florida a few years ago. If you have any ideas on the subject, please let me know, as I’m always looking for ways to make a difference.

I have a die set of a nurse’s scrubs and I’m going to make cards for the nurses on the covid unit in our local hospital. If I could find more and better ways to say thank you, I would. I’d like to start giving back a lot more. I know it’s late, but that’s my plan for 2021…OK, for the next ten months. Maybe next year I’ll get serious about making a plan in January, but I doubt it.

Haul from InLoveArts com and Making a Card from Their Die

The nice people at InLoveArtshop.com sent me some terrific products and I thought I’d show them to you as well as make a card using one of their dies.

http://www.Inloveartshop.com

Discount 20% use promo code G-36627 (Does not expire)

Birth year tape link: https://tinyurl.com/y93zf7m7

Mini Wood Easel link: https://tinyurl.com/3arhasjr

Starry Sky Background Die link: https://tinyurl.com/48928y7s

Heart String Background Die link: https://tinyurl.com/5v8d58j6

Funny Dog Stamps link: https://tinyurl.com/58cjxv8u

ABC Letter Alphabet Word Dies link: https://tinyurl.com/3t3sxxfy

Simple Hollow Lace Frame Dies link:https://tinyurl.com/2z68e6wr

Christmas Series Dwarfs Stamps link:https://tinyurl.com/5x8nxcfa

Rectangular Sunflower Background Die link:https://tinyurl.com/hwancmnx

Enthusiasm Maple Leaf Decor Dies ink:https://tinyurl.com/c2f9kc3r

Making a card with the Heart String Background Die : After cutting out this die and removing all of the hearts from inside the die, I took tear tape and laid it above each of the four rows of hearts, then cut out small rectangles in three different colors of scraps. I laid each of the rectangles over a heart and made sure that the paper covered the whole heart. I alternated the three colors (light purple, dark purple, light green, and when I went to the next line of hearts, I changed the first color (first row, light purple, second row dark purple, third row, green, fourth row should have been light purple, but I screwed up and started with light green again, bummer.) I used the cardstock scrap from cutting out the alphabet dies to layer the hearts on, and had paper that matched, and made a 1/2″ border so it really stands out. I used a 5 x 7″ card base and cut a hugs die with a surround, out of four different colors and should have gone with the original two colors as I think they looked better. I cut the letters out of hugs and laid a different color on each letter and used Nuvo Precision Glue Pen Link: https://tinyurl.com/ktsavjx2

I put tear tape link: https://tinyurl.com/7sa89tr3 on the back of the striped paper and laid all three layers onto the card base near the top. I glued the “Hugs” near the bottom on an angle, and laid three of the red hearts that came from the heart die beside hugs. I added Glossy Accents link: https://tinyurl.com/twrxaw24 to the hearts. I used the .5 oz bottle, but if you can squeeze the 2 oz bottle, I recommend you buy that as you’d save a good amount of money by doing so.

Showing Cards/Gifts & Making Bulk Cards Using Hunkydory Images & Watercolors

I wanted to replenish my card stash, so made this video showing how to do it as quickly and simply as possible.

First, I wanted to share the Christmas cards I got from friends..

Next I want to make cards using HunkyDory and 3d Push Outs.

Here are the links to the 3d Push Outs: NOTE: Since these products came from the UK, I could only find links from Australian based craft companies. The price was only $2.50 per package, but shipping might be exorbitant so you’ll want to check that out..

SB10486 Keep it Cool 3 D Push Out Amazing Owls link: https://tinyurl.com/2s6sjpjr

SB10308 Keep it Cool 3d Push Outs Cool Birds (Cardinals) Link\:https://tinyurl.com/nf77ujr8

Three 3d push outs, they have numbers from top to bottom, from 1 to 4. You’ll want to use the largest image (at the top) #1 and glue this in place on your card. I always like to snip off the small tabs that connect it to its backing, as otherwise, it has an unfinished look. Then take # 2 image, and add foam squares to the back and lay it over the #1 image so it lines up perfectly, then do the same with #3 and #4. As the images get smaller, you’ll need to cut your foam squares in half. I use Bearly Art glue to glue down the smallest pieces that you can’t put foam squares under.

At 11:30, I started making watercolor cards. I show a lot of background stamps, but in the end, didn’t use all of them.

Here are the link to the background stamps I showed:

Rubbernecker Stamps: Poppies Background: Sorry this was retired.

The Ton Stamps: Peony Garden link: https://tinyurl.com/8983n44s I didn’t use any of these stamped images, as my embossing didn’t work well. My fault, I had a small dog hair in the embossing powder that ruined the images.

Rubbernecker Stamps: Abstract Roses This stamp has been retired, but Rubbernecker has a new stamp that looks very similar..here’s the link: https://tinyurl.com/2vujj6jb

Unity Stamps: Obsessed with Floral link: https://tinyurl.com/ssk8ecsc

I used inexpensive cardstock from Joanns that is 12 x 12 white from Park Lane. I cut these into 6 x 6″ pieces so the background stamps aren’t going to stamp to the edge of the cardstock and I have somewhere to hold onto.

The embossing ink I used: Brutus Monroe Embossing ink and I used his embossing pouch as well.

Embossing Powder: Ranger Gold and Ranger Silver

I stamped the Unity Stamp Obsessed with Floral stamp by putting the stamp face up on my desk and using the paper I’d cut (and covered with an embossing pouch to eliminate fingerprints or excess embossing powder) I laid the paper over the stamp after I’ve inked it with embossing ink and holding it in place with one hand, rubbed the paper with my other hand. Then I put embossing powder over the image and tapped off the excess onto a piece of scrap paper and put that powder back into the bottle and closed the top. If there are any stray bits of embossing powder, take a paint brush and wipe them off. I heat set the image and then after it was cool, I painted it with watercolors set of 36: Pretty Excellent Paint link: Amazon: https://tinyurl.com/vta5x2xc price $18.98 w/ coupon The brushes I used were from Creative Mark Polar Flo #2, #8 from a set of 7 I got from Amazon. Link: https://tinyurl.com/rjr2f29y

I colored the background with a couple of colors mixed together..I used a green and a lighter green and some water so they are muted colors. For the flower I used the third yellow from the left, Cad Yellow for the stamen with the #2 brush, then mixed an orange and a red to make it more reddish orange for the rest of the flower.

The metallic glitter card bases I bought in a big box from Michaels several years ago so I don’t have a link for them. They are A2 size cards, 5 1/2 x 4 1/4″.

I cut the floral images to 4 3/4″ tall by 2″ wide. I cut a layer of mirror cardstock (matching color) to go under these to 4 7/8″ x 2 1/8″ I used Bearly Art Glue to glue the watercolor layer to the mirror layer and then I used hot glue to adhere these layers to the card base.

By cutting the watercolor bases to 2″ wide, I was able to get two out of every background I colored. I could have cut the centers out of the mirrored cardstock to use in other projects, but didn’t feel like going to that much extra effort.

Prized Peony Card & How to Use the Peony Dies (Kind of Tricky)

I wanted to make a card featuring the Prized Peony stamp and die set from Stampin’ Up.

Prized Peony stamps link: https://www.stampinup.com/products/prized-peony-cling-stamp-set-(en)

Prized Peony dies link: https://www.stampinup.com/products/peony-dies

I used the old Stampin Up punch called the Modern label punch that’s retired but you can still find it on ebay..link: https://tinyurl.com/x7j9vtsu I punched out the sentiment from white cardstock scraps using this punch, and laid the sentiment aside.

Coloring was done with Arteza Everblend (alcohol) Markers, but any alcohol marker will work. It appears that Arteza is revamping their markers. I have several different types of alcohol markers and they all work well, so use whichever set you want.

I used Colorbox inks on the die cuts that are no longer sold, sorry.

I colored the stamen with a black water based marker and made sure to color the edges then used a Wink of Stella black marker from this set: https://tinyurl.com/khbelt4a to go over the black ink.

I used Bearly Art Glue Link: https://tinyurl.com/2em4sp52

I cut out all of the dies on white card stock then using Dollar Tree makeup brush link: https://tinyurl.com/1q6eohz0, I colored the tops of all of the flower dies, and used green alcohol markers on the leaves. The leaves come in two pieces each. One leaf has a straight edge and there’s a second die with a straight edge that you’ll color a different green color and lay on top of the straight edge leaf, gluing them together. The other leaf has a more jagged edge, so you’ll use the corresponding jagged edge piece to lay on it.

To put the flower dies together, start with the smallest die cut that you should have inked the top of, then take the next bigger die cut and slide the smaller die cut into the slit in the bigger die cut and line up the bottoms of both and put a dot of glue near the bottom between the two. Then take the next bigger die cut and slide the other two die cuts into that slit and line up the bottoms and put a dot of glue between these near the bottom. Insert the stamen in the top middle of these dies, and glue it in place. Then take the biggest die cut (this one should have color all around the edges) and insert the other die cuts into the slit on this one, line up the bottom edges of them and put a couple dots of glue at the bottom and squeeze until the glue sets. The flower is now done. You can glue your leaves to the back and ruffle out the edges if you want a more 3-d look.

The card base is 5 1/2″ tall by 4 1/4″ wide. I used white heavyweight cardstock from Michaels Recollection line link: https://tinyurl.com/4xwvbwpe and glued a layer of pink cardstock that is 5 3/8″ tall by 4 1/8″ wide to the front of the card base using a Tombow tape runner link: https://tinyurl.com/3kwjkkry I glued the die cut leaves to the back of the flower and after gluing the flower in place, I added foam squares to the back near the bottom of the leaves so they’d have dimension.. I glued down a stem and bud that I’d stamped from the Prized Peony set then glued the flower to the top of the stem. I had to add more marker to the stem to make it look strong enough to hold the flower. I laid a piece of organza clear ribbon that had gold edges (from my stash) to the bottom of the stem and wrapped it under the pink card stock layer by gently lifting the pink card stock. I used foam squares to adhere the sentiment we punched out at the beginning of the video to the ribbon. I forgot to mention that I used the makeup brush from Dollar Tree with the same ink from Color Box and brushed around the edges of the sentiment so it looks like it fits the card.

I wanted to add some dimension to the bud, and originally put Diamond Glaze on it, but it looked odd, so I tore off that bud and re-colored two buds, gluing one in place, and adding a couple of smaller leaves I had stamped and hand cut out to either side of the base of the bud. I took a foam square cut in small pieces and adhered it under the base of the bud so it’s angled up and has good dimension.

I took small pink diamonds (from my stash) that were adhered together, and cut them so they could be used singly. I used a diamond tool with wax in it to pick them off their backing and adhere them basically all over the card. I think they really set the card off..

Newhomy com Haul + Finished Diamond Art

The nice people at newhomy.com sent me some of their products to try.

http://www.newhomy.com

Christmas Tree LED Light link: https://tinyurl.com/1vbsuzzp

Diamond Painting Tool Point Tray link: https://tinyurl.com/2zxlkytx

5 pc Diamond Keychains link: https://tinyurl.com/43674oq7

Wood slices are no longer available, sorry

Christmas Wood Packages unfinished, no longer available, sorry

Lighted Diamond Painting Pen link: https://tinyurl.com/49bl72fe

Diamond Painting Lady with Umbrella walking in Park link: https://tinyurl.com/3rsm3cju

I feel terrible that I haven’t been writing…

I can’t tell you how badly I feel for not keeping up with my blog, but since my sister passed away and we had covid, my level of ambition is low. Tonight we went to our college alma mater, and I conducted an etiquette dinner for a group of juniors and seniors. Rich gave a speech about his career in pharmaceutical sales, and it was a nice evening. I always feel a lot better about myself when I donate time, and since covid, that’s another thing that’s been tough to do.

I’ve been reading a lot lately. I like crime dramas and murder mysteries, and have just finished a series of books by James Patterson that are NYPD Red..they’re numbered 2-6…they’re entertaining and very fast reads.

I’m lucky because here in Pennsylvania, we have the Philadelphia Free Library where we can get up to 6 ebooks at a time to read for free. You have them for two weeks and then they go away, and I really love this service. I’m not sure how I found out about it, but it’s a great thing for avid readers. I read a lot and like books that are fast reads. I’ve never been into books that are tough to get through and I remember when Oprah had her book club and would talk about a book that took her a while to get through, I always thought “I’ll pass on that one.” I enjoy James Patterson’s books that he writes with another author, and I wonder how much of these books he actually writes, as he puts out a ton of books a year. If you’ve ever looked at the number of books he says he’s written, it’s unbelievable. I have often wondered if he writes any of the co-authored books. Let me know what you think.

As for my craft room, it’s still a terrible mess. I wish I could get one of those women that organize to come in and figure out what to do with all of the things I’ve accumulated. It’s crazy (or maybe I am.)

I have been doing a lot of crafts and Rich is lagging behind on editing the videos. I probably have four or five that he needs to upload. I don’t like to push him because he’s got his own interests and I don’t want to take away from them.

You can tell that I’m not doing much and don’t have much to talk about. I wish I had more to say, but sadly, during covid, I think we all struggle to keep busy.