Making a Mini Album: The Binding & Pages that Pull Out

To begin making a mini album, you’ll start by making the binding. I chose to use eight (8) pieces of 6 x 6″ white chipboard pieces (link: https://tinyurl.com/yyx6hupp) and used black acrylic paint to paint the the edges and most of chipboard. I used black acrylic paint from Joanns’ link: https://tinyurl.com/yy62khsu with a foam brush Dollar Tree link: https://tinyurl.com/y5egsl4g. Once dry, they are ready to use.

Cut a piece of scrap cardstock to 1″ wide by 6″ tall and lay it on the left edge of each of your chipboard pieces, then draw a line with a pencil on the edge of the cardstock, so you have a mark running down the left side of your chipboard pieces that is 1″ from the left edge. I took gold colored (Stampin’ Up retired) cardstock and cut 8 pieces of 3″ wide by 6″ tall strips and scored them on the 3″ length at 1 1/2″. I used 1/4″ wide tear tape (link: https://tinyurl.com/y6zwd8rh) and wet glue (I think it was Art Glitter Glue link: https://tinyurl.com/y68b66hz )and laid two rows of tear tape (double sided tape) in the one inch space I created with a pencil line. I put wet glue between the two rows of tape and on the top and bottom and left edge of the 1″ space. To put the album together, take one of the chipboard pieces, add glue and double sided tape (tear tape), and use one of the strips that are 3″ x 6″ scored at 1 1/2″. Fold the strip in half so it’s now 1 1/2″ wide…With the folded part facing away from the album, lay the right side of the bottom of the folded strip on the 1″ line you made with pencil. Make sure it’s well adhered. Then take another chipboard piece and lay it on the top of the first chipboard making sure it’s lined up perfectly and that you’ve added double sided tape and wet glue to the 1″ space. Continue using this system until you’ve used all of your chipboard.

The top piece is your cover…don’t add another 3″ strip to the top of it, as you’ll be using other paper to wrap around the binding to make it more secure, once you’ve decorated the cover. I chose a cardstock that looked like black animal skin and scored it from top to bottom, every 1/8″ from 1″ to 5″ on cardstock that is 6″ tall by 6″ wide. You’ll want the first one inch and the last one inch to be attached to the front cover and back cover of the album. I also lined this piece of cardstock with black Recollections heavyweight cardstock that was 4″ wide and scored every 1/8″. I glued the Recollections to the inside of the center of the animal skin inspired cardstock as I knew the animal paper would tear with use without this additional layer.

To make the pull out pages… Use Recollections Heavyweight black cardstock (link: https://tinyurl.com/y4a5nnfw) two pieces cut to 5 3/4″ by 6 1/4″ and score them on the 6 1/4″ length at 1/2″, plus one additional piece of heavyweight cardstock for the top, cut to 5 3/4″ x 5 3/4″. On the first two pieces of cardstock with the score, fold over the 1/2″ piece and use a bone folder to flatten it. I added tear tape to the 1/2″ area and glued the first of the two 5 3/4 x 6 1/4″ pieces into the album, making sure the 1/2″ score was on the right side so I can add the next layer on top of it. Then lay the second piece of 5 3/4 x 6 1/4″ pieces with the score on the left side, adhering it to the 1/2″ scored area of the bottom piece. Add the 5 3/4 x 5 3/4″ piece on the 1/2″ glue score of the second sheet. I added magnets (link: https://tinyurl.com/y47xzfo4) to keep mine closed. One magnet attached to the right area of the bottom page, then other side of the magnet attached to the top of the right side of the top of the second page, and another magnet added to the left side top of the second page, and the other half of this magnet added to the left side on top of the 5 3/4 x 5 3/4″ page (third page) with tear tape under them. Once the magnets are in place, decorative paper can be added. I always lay my magnets at least 1/2″ from the edge of the cardstock, to ensure that the decorative paper covers it completely.

I didn’t show this in the video, but I also cut two pieces of purple cardstock cut to 3″ by 5 3/4″ and adhered them together with tear tape and wet glue and let them dry. I used a scalloped border punch link: https://tinyurl.com/y2mcl3nl on the 5 3/4″ length of the cardstock, then adhered this to the top cardstock so the scallops will hang out of the underside of the cardstock and the rest are adhered to the back of the top cardstock in the pull out. This will act as a handle to lift the pull out.
I’m Obsessed with Watercolor Paint Sets

I thought I’d change things up on my blog and write what I’m going to be talking about instead of using dates. I am obsessed with watercolor paints. Since I’m not an artist, (and don’t play one on TV) I have no idea why I need to have so many paints, but here we are. Hi, my name is Sandy, and I am an addict. You probably think I’m just being funny, but if I watch a YouTube video and the artist is using watercolors that I don’t own, I immediately start checking where I can buy them. What’s wrong with that, you might say. Since I already own:

Arteza set of 60

White Nights

Pretty Excellent

Amazon no name set that Lindsay recommended

Gansai Tambi

Viviva Watercolor Sheets

Niji Pearlized Watercolors

Daniel Smith Set of 6 Primary Colors

You probably thought I was exaggerating…Oh, and there’s another set that I bought and then gave to a friend, because I couldn’t deal with half pans. I’m not able to keep my paints from contaminating each other when I use half pans and that drives me crazy. So I only buy full pan palettes now. And that’s another obsession..making sure I have a metal palette with mixing wells for full pans. Sure, I have to have those too. In case you wondered, I really like the Meeden metal watercolor palettes they sell on Amazon. They have a wide variety of sizes and colors, and the ones I’ve bought, hold full pans and have two mixing wells. I need a lot of mixing space, because unlike people who watercolor and use a small area to mix one color, I use almost one entire side, mixing just one color. (I never said I was good at using mixing space wisely, did I?)

I wish I could say that I aspire to be able to paint like a professional watercolorist at some point, but if you’ve ever seen me watercolor a stamped image, you know I can’t bend my wrist to hold the brush at 90 degrees, so I guess I’ll never have one of my paintings in a museum, darn it.

So what plans do I have for using all of these paints? I really enjoy watercoloring stamped images, and, I’ve found it’s really satisfying to blend my own colors….so that’s my plan. Continue to use all of the different watercolors I own, and have a good time doing it. The good news is that I’ll never have to worry about running out of paint, until the next video with a set I don’t own comes on YouTube, and I’ll probably add them to my ever-growing collection.

GBFKE com Diamond Painting Art Unboxing & Giveaway

The nice people at GBFKE.com (https://gbfke.com) sent me some great diamond art and I really appreciate that they did.

They have some great special deals right now including:

Sorry this deal changed to, Buy 3 get 1 free link: https://tinyurl.com/y5twvkvs

Products for 3.99 (They sell in European pounds) link: https://tinyurl.com/y6ea4o8e

Products for 4.99-6.99 (In pounds) link: https://tinyurl.com/y4w3zuur

Here are the links in order of when they appear in the video.

Framed White Bear link: https://tinyurl.com/y4kfw2pe

Owl Journal//Notebook link: https://tinyurl.com/y2yrjvyv

Two Mary Bookmarks link: https://tinyurl.com/y5vclmwl

Blue Mandala Notebook link: https://tinyurl.com/y4m7gg4b

Multi Color Mandala Notebook/Journal link: https://tinyurl.com/y5fyomkp

Food Magnets link: https://tinyurl.com/yxvm7k5r

Giraffe Bookmark link: https://tinyurl.com/y3a3w3vu

Mandala Notebook/Journal I showed this one finished earlier in the video, link: https://tinyurl.com/y5fyomkp

Peacock bookmark (for giveaway) link: https://tinyurl.com/y63cv94f

Peacock bookmark (I show this one finished) link: https://tinyurl.com/y43aakyw

Two flower bookmark link: https://tinyurl.com/y2q53szu (Rich accidentally cut this out of the unboxing, sorry)

Floral lamp link: https://tinyurl.com/yxbyxlhu

To participate in the drawing: Sorry, only addresses inside the USA are eligible..Drawing will be held on 9/15/2020.

Please write in the comment below the video, either:

I’d like to have the owl OR

I’d like to have the peacock and include your email address (if I don’t have it).

PLEASE do not say you’d like to have either, or you’ll be ineligible to win.

I’ll email the winners on 9/16/2020 and if I don’t hear from the winners by 9/25/2020 with their mailing addresses, I’ll choose another winner.

Thanks again, to the nice people at GBFKE.com, for all of the nice diamond art they sent me.

A Simple Elegant Wedding Card w/ Rubbernecker Stamps

I bought the stamp, Melissa, from Rubbernecker Stamps, at a stamp show last year. Since then, they’ve discontinued the stamp and only sell a wedding stamp called First Kiss, here’s the link: https://tinyurl.com/y4wcf5eu I wouldn’t have made this video if I’d known they discontinued the stamps I’m using…sorry.

The card base I used is a Tiffany Blue color and is 5 x 7″ tall. Inside the card, I stamped a wedding sentiment (I bought at a stamp show) with a Stampin’ Up retired color of ink, Pool Party.

Stamped the bride in her dress (Melissa) on a 5 x 7″ scrap of white cardstock in an old Stampin’ Up ink called Pool Party. Then I used another retired Stampin’ Up ink called Soft Sky for stamping the skirt…I moved the skirt stamp a little to the left of the first skirt and inked it with Color Block My Favorite Things Sno Cone ink. I wanted the bride to be the focal point of the card, so fussy her, then added a layer of silver glitter cardstock under her adhering it with Avery Permanent Glue Stick link: https://tinyurl.com/y3h6vfjl I cut this layer out, then decided the bride needed more backing, so added a layer of silver foil cardstock and cut this out as well, following the outline of the Melissa stamp.

I added foam tape to the back of the foil that I bought at the Dollar Tree in their craft department. It’s not a very thick foam tape, so shouldn’t add to mailing costs (if I had mailed this card.)

Stamped a wedding sentiment I got at a stamp show from Just for Fun (apparently no longer in business, so I’m two for two on stamps I bought last year, bummer..) on the same white cardstock in Pool Party ink, and die cut it with wavy pierced layered rectangle dies from Whimsy Stamps link: https://tinyurl.com/y5so47a2 I die cut a larger silver glitter rectangle to layer under the sentiment and added foam tape between the sentiment and the glitter paper, as well as under the glitter paper, to give it more dimension.

Chose matching ribbon with ruffled edges and put tear tape under the center of the ribbon then laid it on the card, running from the top to the bottom, so it would be under the sentiment and bride, and laid the bride and sentiment on the card front.

9/3-9/6/2020

My closest friend’s son got married this weekend, and Rich and I were happy to help wherever needed. Friday night, we helped set up a picnic style rehearsal dinner for her while the wedding party was at rehearsal. We picked up the hot foods and Rich was busy setting up Sterno burners for them, while I minimally decorated the tables. They had the dinner in a picnic shelter at the back of the groom’s property. It was primitive, with no electricity, so required some inventive lighting and food warming, on my girlfriend’s part. The pans that came with the Sterno, weren’t very deep, and Rich was worried the wings would burn and stick to the thin aluminim pans provided, so he layered a second aluminum pan under with small stones inside. It was a really smart way to maintain heat, but make it so the pan with the wings inside wasn’t sitting directly on the lit Sterno. I guess I’m not the only MacGyver in the family.

The church wedding was yesterday, and we chose (because of Covid and the ability to social distance) to skip the wedding and go to the reception that was being held outside under tents. It was the perfect day for a wedding, with heat in the low 70’s and a bright blue sky. The reception was held in the mother-of-the-bride’s backyard under a tent. To be honest, I wish they had rented a second tent, as the tables seated eight and were crammed together to the point that I couldn’t pull out my chair and sit down without running into the chair behind me. It was a little cramped, and luckily, only one other couple was at our table. Since we only knew the immediate family, we didn’t really know anyone else there, so befriended the other couple at our table.

The bride’s mother put a box of cookies at every place setting, as well as a bottle of hand sanitizer, which I thought was smart. Although they served dinner buffet style, there were servers to make sure people weren’t touching the serving utensils. It was a lovely reception and it was nice to see the groom so happy. My girlfriend looked great in her dress we’d bought, that matched the wedding colors exactly, navy blue and burgundy.

As we were leaving, my girlfriend made sure we took lots of cookies and a few cupcakes home with us, as she knows we’re both suckers for sugar. I made sure to bring extra cookies for her, knowing she’d take a lot with her, but would give them to others, leaving none for herself. When I talked to her today, that’s exactly what she’d done. I think she was happy to know that we’d made sure to bring extra boxes of cookies for her.

We spent the evening having hot tea and cookies, and watched a series on (I think) Netflix about an pair’s ice skater who is bi-polar. It had ten episodes and I can’t say the last few were worth watching. In the end, it was like every other movie about pair’s ice-skaters. If you’ve seen one, you’ve seen them all…Boy and girl meet, boy or girl is wealthy and spoiled (the other is not). They skate together, one is overcoming an injury/fall, and by the end of the movie/series, they’re in love..The End. OK, there was more to it than that, but I think I saved you some time watching it. I couldn’t remember the name of the series, so asked Rich…it’s called Spinning Out.

Today is all about cooking. I like to bake bacon and put it in the freezer, so whenever Rich wants a few pieces, he can microwave them in seconds. I hate the smell bacon makes when it’s baking, so make sure I bake at least three pounds, so I don’t have to do it often. He’s a bacon fanatic….Bacon and Mountain Dew are his favorites.

Once I finished, Rich started making enchiladas. His recipe is from his best friend’s Mom. She made her tortillas from scratch, and her enchiladas were amazing. It takes all afternoon for Rich to make them, and we freeze them as well, so we have an easy meal whenever we want. He’s a good cook but even better baker. Since Covid, he’s been perfecting his white bread recipe. It’s really good and he’s come a long way from a loaf that wouldn’t raise, to one he photographs and shares on Facebook.

I’m going to put up a video of the wedding card I made. I bought the stamps at a stamp show last year, and it seems since then, the bridal stamp has been discontinued and the company I bought the sentiments from, is out of business. It’s hard to keep up with current stamps, as it seems companies aren’t keeping them in inventory very long before retiring them. Or maybe they were in their inventory for a long time before I buy them, and then they retire them. Either way, it’s a bummer that I’m showing a card that you literally can’t reproduce…Geez…

Back Cover of the Art Journal..It’s Finished!!

Finally, the back cover of the art journal I made from a children’s book.

To complete the art journal, I used pages from an old dictionary, and cut the pages so the borders and any pictures were eliminated. I had to use scissors on the dictionary pages, as my paper trimmer tore the paper because it’s so frail, and I was doing this on a very damp day, and that affects how trimmers work on thin, frail paper. I adhered the pages to the back cover of the art journal with PVA glue link: https://tinyurl.com/y5k3w5a5

I used a napkin from the Dollar Tree. To separate the layers, I put a piece of washi tape on the back edge of the napkin, then holding the front, pull the washi tape and the layers come apart. Sometimes you’ll have several layers and you might need to do this process a second time. I cut out the images I wanted to use, then started gluing the onto the journal. Using a brush and the PVA glue, I laid all of the images from the napkin in place. Once the glue was dry, it was extremely tacky. (To eliminate this problem in the end, I simply added a coat of Collage Pauge over the cover, and the tackiness was gone.)

I used a Sharpie Oil Based Marker link: https://tinyurl.com/y47epag4 in black and one in white to add some details and line the images. I wasn’t crazy about how the page looked, so I added another bee and a few more flowers over the existing ones to add more interest, then added Collage Pauge Matte link: https://tinyurl.com/y27tr7x8

I took another Dollar Tree napkin with a different pattern and cut out some of the flowers to layer over the existing ones that didn’t have much interest, to me. I used Diamond Glaze link: https://tinyurl.com/y2pqxl6w (it’s just like Glossy Accents) to create a three-dimensional look on the orange flowers.

NOTE: Please don’t use the links I provide to buy products, as I didn’t do any price shopping. I only provide links so you know what the product looks like and a place you can buy them. I always recommend you try to find the products somewhere you can use a coupon, to get the lowest price possible.

8/29-9/2/2020

I’m sorry I haven’t been updating the blog, but I haven’t had a lot to say until today.  Yesterday, Rich and I went to friends to deliver the Mickey Mouse diamond painting I made for their new grandson.  His room is decorated in Disney, so Mickey will fit right in.   I was happy that our friends liked Mickey, as you never know when you give someone something crafty.  They might think it’s tacky, but I figured a little boy would love it..at least for a little while.

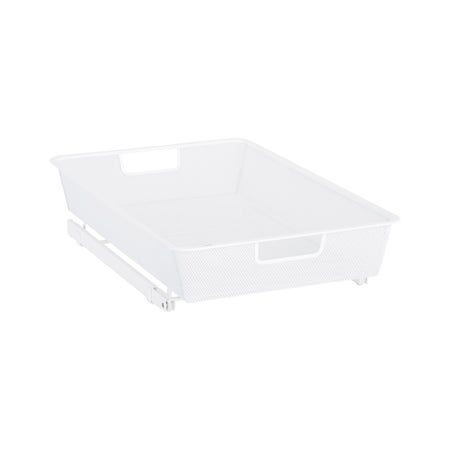
When we got home, a box had been delivered from the Container Store.  I almost titled this blog post, “What’s the hype about the Container Store?”  The box was big, just big enough to hold the bins I’d bought, without any packing materials.  The metal bins must have shifted in transit, as the side of the box was ripped, probably at least six inches long.  Because there were no packing materials inside, the bins were dented.  I thought I’d bought the photo below, but the rails weren’t in the box.  I’m glad I didn’t call the company until today, because the rails arrived in a separate box today.

&

I hate when I’ve waited weeks to get something and then when it comes, it’s damaged.  It’s so frustrating.  I called the company, and their customer service area was too busy to take my call, so will call me back when they are available.  I guess I’ll wait to see how long it takes.   I uploaded this post before they called back, and almost three hours later, they’ve finally called….so glad I didn’t wait on hold all of that time, haha…

I wish I could say that I’ve re-organized my craft room since I last wrote, but the honest answer is this.  I’m overwhelmed by the idea of starting.  I have been re-organizing drawers in my desk, but can’t force myself to begin the process of taking out storage units and replacing them with the new ones I have.  It’s more than I feel like tackling right now.  (At least that’s the answer I tell myself.)

As for crafts, I’ve been making cards, and videos, and have been watching videos to give me ideas for future videos.  I’d like to make some decorated bobby pins and different types of earrings, some made with paper and others with cardboard and plastic water bottles.   I’d like to find some beads I’d like, but I don’t want to buy a long string of beads, when all I really need are two.  If you know anywhere I can buy a small quantity of beads, I’d appreciate knowing where, because I already have a lot from ones I’ve previously purchased, but they aren’t what I’d like to use with projects going forward.

I normally would be working on gifts to donate for Christmas, but with Covid, I’m not sure if anyone is accepting cards or gifts.

I like making gifts for a local nursing home, but was recently told that nursing homes aren’t accepting anything for patients because of Covid.  I understand their concerns, but think they could put donations somewhere away from the patients until they are deemed save, and then give them to patients.  It’s made me wonder if they are allowing them to have their mail…If they don’t allow patients to see family, I’d really hope they’d be able to figure out a way to allow them to get some gifts from the outside.

These are such frustrating times.  Our great niece (that I made the college album for) went back to college two weeks ago…Granted, she is going to a large university, but in two weeks, they’ve already had more than 500 Covid cases.  It’s mind-boggling that so many students would put themselves at risk like that.  Of course they’ve shut down campus living, and our great niece is now home, to continue her education online.  It’s such a shame, when people pay so much for a college education, to basically throw it away by engaging in Covid parties, or basically, not following the CDC guidelines.   And this is a school that made the students sign a contract, saying that they would abide by the CDC guidelines and not attend any social events.

When Rich and I went to college, we had a professor who would make you calculate the cost of sleeping through one class.  Let’s just say the people who had the misfortune to fall asleep during one of his classes, never did so twice.  I don’t think kids today have someone in their lives that is willing to show them just how much (in the form of lost face-to-face education) their actions are costing them.  Even if they did, I don’t think the students would actually care.  Until it’s time to start repaying their student loans, their education doesn’t appear to have a cost to them.  It’s especially sad for the students who really want to be on campus and have a full college experience, and abide by the CDC guidelines, as they’re the ones who are most affected by campus shutdowns.


Building a Stamped Scene…Way to Goat Card

I started with Stampin’ Up’s “Way to Goat” stamp set…link: https://tinyurl.com/yytfcv4k

On a piece of watercolor paper cut to 4 x 5 1/4″, I stamped the goats using Gina K’s Amalgam Black Ink, then used clear embossing powder and heat set the images.

I stamped “Way to Goat” on a piece of scrap white cardstock and cut it out using a Spellbinders small die I was given, that originated with their small die of the month club. (Sorry, I don’t know the name of the set.)

I used Hero Arts County Fair stamp set for the farm from the July 2018 month kit. I used the fence from this set as well. https://heroarts.com/pages/mmh-july-2018-kit

Last stamp set used is from Rubber Stamp Tapestry, called Trees. Sorry, I gave the incorrect title twice….geez, I’m sorry.. Link: https://tinyurl.com/y6e3clm2

I used watercolor markers from Stampin’ Up and Stabilo 68 pens. I bought a ceramic chicken at a garage sale that I’m using for mixing marker colors. I mixed a lot of gray colored markers to paint the goats, and basically, used the other colors as is, to paint the background.

To paint the green grass, I used a Stampin’ Up marker and used it to paint some lines in the grassy area, then used a wet brush from Grace Art. Link: https://tinyurl.com/y5lvsyvr I used the wet brush to liquefy the marker to make the grass color. I did the same with a blue marker for the sky.

I used a piece of darker blue cardstock to line the front of the card, so cut it to 4 1/8″ x 5 3/8″ and then lined both with foam tape from the Dollar Tree and laid them on a card base that was cut to 4 1/4″ x 5 1/2″. I used the die from Spellbinders to make the sentiment look like a prize you’d win at the county fair. I cut two “legs” out of the same blue cardstock I lined the card front with, and put it on foam tape from the Dollar Tree and laid it over the tree area of the card.

Art Journal Pages, Free Printable, Ripped Background

I painted the cardboard kid’s book I’m using as an art journal with Pebeo High Viscosity Acrylics in Irridescent Green/Yellow link: https://www.dickblick.com/items/01611-7011/  Then let it dry.

I went online and found a free printable at coloring-pages-printable.com and here’s the link to it. It’s called Full Page Butterfly and Flowers…link: https://tinyurl.com/y4yqyr6f   I used Arteza Twi-Markers link: https://arteza.com/dp/twimarkers-set-of-48-colors-dual-tip  and spent a lot of time coloring, then used Jane Davenport’s Paint Over Pens link: https://www.michaelskids.com/jane-davenport-paint-over-pens/10537630.html to add some highlights when I was finished coloring. Since they are more pastel, it was easy to lighten the images.

I ripped the colored image from top to bottom in thin strips, then used Collage Pauge in matte link: https://www.dickblick.com/items/24237-1005/ (I bought mine at Hobby Lobby, but I couldn’t find it in their online store.) I adhered the strips to the book and had some issues with spacing. I also learned the hard way, that I needed to cover the ends of each page, and had to piece together paper I didn’t use to cover the ends. I used a Touch 5 alcohol marker in Warm Grey 2 and an Arteza Alcohol Marker in Cloudy Grey to color the edges of each strip of paper, to make it look more like they were closer together.

I used an old DCWV Vellum Quote Stack…they’re no longer sold in stores, but easy to find on Ebay..link: https://tinyurl.com/y5p5qcep  I glued them with Collage Pauge in between the strips on the green area. Then I added some diamonds I got from nail art at the Dollar Tree or with diamond art, like this set from Fansells.com link: https://tinyurl.com/yy8qpnk9   I used a pick up tool from We R Memory Keepers, called a Quick Stik link: https://tinyurl.com/y2mv24xj to apply the diamonds and ultimately, used Martha Stewart’s glue in the fine tip applicator bottle with the new pin I made to make sure I no longer lose them…Here’s a video where I show how to make the pins. https://www.youtube.com/channel/UCiFSJBbEoVIywsQvKMUG0mQ

8/22-8/24/2020

I have got everything ready to reorganize my craft room, including two new tall dressers, and a third if I need it.  All I have to do now, is pull everything off of the floor and put it into another room so I can have Rich put the new dressers in place.  I know a lot of people like shelving units, and I’ve used a lot of them in my craft room in previous years, but I find they are huge dust collectors and there are too many things sitting around to keep me organized.

The thing I’m going to differently with this reorganization, is that I am going to record what’s in every drawer so I can easily find things going forward.  I used to just put a new system in place and throw whatever tool fit inside, and went with it.  I have found that I’ve misplaced so many things that I’ve started buying duplicates, especially with glues and double sided tape.

I keep telling myself that today is the day I’m going to start, but for some reason, I’ve put off doing anything for the last three days.  Instead I made a new diamond painting haul, and today worked on a couple small diamond paintings instead of cleaning my craft room.  Then tonight I decided to bake Rich a zucchini chocolate cake (it’s really good by the way.)  I found the recipe online years ago, and have been making it ever since.  My father-in-law would never consider eating zucchini, so when I took a piece to him, he loved it until he found a piece of green and we had to admit it had zucchini in it…and that was the end of that.  It’s funny, once you tell someone what’s in a recipe, how it can change their perception of its taste.

The cake just came out of the oven, and there’s nothing better than the smell of chocolate baking.  OK, maybe something with cinnamon in it…I love that smell too.  And clove…there’s nothing like the smell of a ham baking with cloves and brown sugar…yummy.

The last few weddings we’ve been invited to, the bride’s registry always includes a Kitchen-Aid stand mixer.  I often wonder with today’s busy lifestyle, how many times these brides will use their mixers.  I waited until I retired before buying one, because I knew I’d never use it enough when I was working.  As for the new brides, with Covid, I’m wondering if more and more people have been eating in more, and actually cooking.  The only thing that kept my sanity when I worked, was a Crock Pot.  I know a lot of people like Insta-Pots, but after trying one, we returned ours to Amazon.  It wasn’t Instant enough for us.  We didn’t know there was a big warm up time, and a cool down period, plus the “Insta” period…making it a lot less “Insta” than we had hoped.  I still love my old trusty Crock Pot.  There’s nothing better, especially in the winter months, than throwing a frozen roast or chicken into the pot in the morning, with some broth and a few vegetables, and when it’s time for dinner, open the lid and it’s perfection.  I don’t know of any other appliance I’ve ever used that I loved as much, or that made good meals so easily.  I wonder if new brides know the wonder of a Crock Pot.

I’m sure by now, you can tell that I’ll do anything to avoid cleaning my craft room.  I plan on making a video of it, so you can see what a horrible mess it’s in.  I’m kind of embarrassed to show it because I won’t let any other room in my house get like this.  The big problem was storage space, and hopefully, now I’ll have enough…Let’s cross our fingers that I do.  Otherwise, I’m going to have to do a major purge.