I finished a card I made using acetate as the card front, and covering it with large gerber daisies. It looks great and I can’t wait for my girlfriend to get it, as she loves gerber daisies.
I also made a wreath builder template. I saw it on several YouTube channels and thought, how hard could it be to make, and the answer is, not very hard at all. The hardest part about it was trying to find small images that I could stamp in my MISTI that weren’t peg stamps. I actually tried using the template with the MISTI and using peg stamps first, and honestly, I think my wreath turned out just fine. Did I use it like it was intended, no, but I make the best wreaths with my peg stamps, so why not use them instead? At the very least, I wanted to show people that you don’t need to use a wreath builder template to make a wreath. I hope that made sense. I see people using these templates like there’s no other way to stamp in a circle, and I wanted to prove to myself that it just isn’t necessary. With that being said, I haven’t tried using the template with floral inspired stamps yet, and will be jumping on that in the next day or two. In the meantime, I’m so happy that I made a couple of cards that I like, and hope you will like them too.
I got this notification from peg stamps, and thought I’d pass it on…If you love them like I do, you might want to take this opportunity to add to your collection. (I know I will..)
A sale from Pegstamps.com! 30% off select stamps and supplies. Ends Monday Aug. 6th
I’d seen Lindsay, the Frugal Crafter use this plumber’s tape for jewelry, many years ago, and thought it would be fun to use for embossing folders. I also saw Unity Stamps use white acrylic paint as a resist, and wanted to give that a try.
The stamp set I’m using is from Unity Stamps called All Cylinders
and here’s the link to it. https://www.unitystampco.com/all-cylinders/
The embossing folder I used is from Cuttlebug Provocraft called Diamond Plate. Here’s the link: http://tinyurl.com/ycxh86mz
I used foil plumbing tape that I bought at a hardware store that’s used for duct work. Here’s a link to it at Home Depot. http://tinyurl.com/y72uzf65 This tape is VERY sharp, so please be careful when you use it. I covered a piece of cardstock that was 4″ by 5 1/4″ If you don’t want to buy the tape, you could cover the cardstock with aluminum foil instead. I used my Tim Holtz snips to trim the edges. Here’s a link to them: http://tinyurl.com/yb946teq After trimming the foil tape from the cardstock, I ran it through my Vagabond. Then took Pico Embellisher (my nozzle was clogged) and poured a small amount onto the edges of the embossed image to make it look distressed. Here’s a link for it. http://tinyurl.com/yaqvs956 I used a baby bib to apply it, as a baby wipe just wiped it back off.
I used a wide brush and colored about 1/2″ in from the sides, and all four sides with cheap white acrylic paint. Use the same color as your paper, so if you use red paper, use a red paint that matches. Let it dry…I used a much larger piece of cardstock than I needed, probably 4 1/2″ x 6″….This was a problem, because in the end, I had to cut out this technique to make the front fit the card base….I’m sorry about that.
After it’s dry, I stamped the car on it with Versafine Onyx Black ink and then put clear embossing powder on it and heat set it.
I used a new set of watercolors I bought from Amazon for $17.99 now $16.95 and here’s the link: http://tinyurl.com/y984u6z8 and on Aliexpress, $13.87 and the link: http://tinyurl.com/ycxvj6sj The set comes with its own water brush, although I found the one in my set very hard to squeeze to release water. I have others that are much easier to squeeze.
After coloring the red, I used a silver Chalkola marker, link, http://tinyurl.com/y9eztlvp to scribble on a tile and color in the silver parts of the card. I used my watercolors to color the rest of the image, then dried it.
I used Distress Ink Hickory Smoke, to distress the edges of the card front, then wiped the edges so the white paint remained. It’s too bad I had to cut so much off and lost this effect.
I used dotted tag dies from Avery Elle (that appear to be discontinued) and die cut one in red and one in white once I had stamped Hello Handsome on it. I used my paper trimmer with washi tape to cut the white tag down so it would fit inside the red die cut, then outlined the red one in black ink so it would stand out on my card. I applied it to the inside of the red card base with Tombow Mono Aqua Glue.
If you are interested in how I made my custom stamp for the back of the card, here’s a link to another video where I explain it in detail in the more info below section. http://tinyurl.com/y8j3y5uh
Then I took a ruler and a piece of fun foam and poked holes with my pokey tool through the four corners of the car front. I wanted them to be 1/4″ from the corners, so put my ruler on the card and measured so the brads would be in the same spot and straight across the front. After adhering the brads, I put tear tape on the back of card front and adhered the tire track piece and added wet glue as well as it didn’t want to stick to the textured background.
I added tear tape to the back of the tire track layer and attached it to my red card base that is 4 1/4″ tall by 5 1/2″ wide (an A2 size card)..
I had to trim the car piece down to 3 3/4″ x 5″ which eliminated the cool outer edge technique, so wanted to do something to make it stand out, so made clouds by cutting a card stock scrap into soft waves and laid it on the top of the card and rubbed white Unicorn White Hero Arts ink onto it. I used a 1″ chip brush that I cut down from Harbor Freight Liquidators. Link: http://tinyurl.com/ydf7xcpb
I added Spectrum Noir clear glitter brush marker to the car for more sparkle. Link: http://tinyurl.com/y8lbx3rd
I was asked to make a card that featured gerber daisies. I have a stamp that I think is a gerber daisy, and decided to make a card with a clear acetate front, covered in daisies and leaves. I used my new Arteza brush markers, and had a lot of fun making daisies. The leaves turned out even better than the daisies, and when it came to gluing them onto my acetate, I just couldn’t find the right placement. The daisies look odd, and I’m just not happy with it. So instead of waiting a while and coming up with a new plan, I took Stickles and coated the flowers with them. Right now I’m thinking of throwing in the towel on this project, as the flowers look odd and the only thing I really want on the card are the leaves.
I’m thinking I need to sleep on this to decide what to do with this card. Tomorrow, Rich and I are going to see the new Mission Impossible movie (if there are no thunderstorms, as Honey has been really struggling with the changing weather.) I hope we get the chance to go, and I’ll tell you all about the movie after we see it.
I spent a rainy afternoon making a card for Rich, featuring his Mustang. I don’t often make cards for Rich, and he deserves to be spoiled, so today was the day.
The card had some issues, but I hope, in the end, that he likes it. I did a few different techniques and ended up completely cutting out one of them….I wanted to include it, but the image was too large, so I had to cut it down to fit on the card base….oh well, at least you’ll get to see the cool effect before I cut it off.
Other than making the card, Rich and I tried a new recipe for steak on the grill. You coat the steak with kosher salt and let it sit for an hour. Then thoroughly rinse the salt off, and it tenderizes the meat. What I suspected, and what actually happened, was the salt made it super salty, and no amount of rinsing would help. The steak was edible, but boy was it salty. It’s just like making cards. If you never try a recipe like this, you’ll never know if it works or not…and I don’t recommend this one.
Where did the month of July go? Holy cow, it went fast! I put the fishy tag online accidentally, before finishing my notes, or adding any videos to the end, and am not really sure how I did that, but went back in and fixed everything later. I’m just glad it’s up.
I went into the craft room and worked on a card featuring an old Mustang convertible, and I really liked the technique I used, but did it on a piece of cardstock that was too small, and I lost part of the car in the process. So tomorrow I’m going to redo that part of the video and try to make the technique work on a larger piece of cardstock, or do less of the edging technique, so both can exist on a regular size card. I would have loved to have made it a 5 x 7″ card, but am also using an embossing folder, and it’s only large enough to work with a smaller card. And speaking of the embossing folder, I wasn’t thinking, and put too many layers into my Vagabond and halfway through embossing, the machine jammed. The one thing you have to know about the first Vagabonds (like mine), is if something jams in them and you can’t get them out, your machine is toast. So I tried getting it out on my own, then enlisted Rich to push down hard on both sides of the “sandwich” while I pushed the button….It came right out. Without his brute strength, I would have had to throw in the towel on it, because I tried to fix it by myself for at least ten minutes before giving up. Every time I do that (almost getting something stuck), I swear I won’t do it again. It only takes a few months for me to forget, and next thing you know, I’ve got another jammed embossing folder. I’m not equipped to use a machine that doesn’t know to reverse when it’s going to jam. That’s the great feature of the Vagabond II….reverses when it’s going to jam…I could have waited for it to come out before buying one, but just wanted one so badly, and now I kind of regret it, as there might be a time that even Rich won’t be able to save it.
I wanted to give our friend Becky a fish bowl for a “thinking of you” present, and thought a fishy gift tag would be perfect to go with it.
I used a Hero Arts Stamp set called Layered Goldfish for my images. I put Gesso on a gift tag and let it dry. I stamped “Just Keep Swimming” from the stamp set on the tag with Versafine Onyx Black ink and clear embossing powder from Ranger to heat set it.
I took a couple of stencils to create a background…I used one that looked like waves and another that looked like droplets of water so I could create colors….I put painters tape on the back of the tag and attached it to the stencil, then used a 1″ chip brush and wiped the small Distress ink cube onto the stencil, then wiped it with the brush onto the tag underneath. It helps make the brushed ink much bolder than if you just brushed with the ink on with the brush. I took the droplet stencil with a darker blue ink and brushed it through….I was trying to do things quickly so didn’t let it dry and wiped it, so wiped away a lot of my pattern….I used Tumbled Glass and brushed it over the other patterns and went around the edges with the Tumbled glass ink pad as well. I took the wave stencil and went over it again with Broken China after drying it.
I took a white card stock scrap and stamped out the goldfish with Sweet Corn ink from Gina K and a Stampin’ Up ink called Tangelo Twist. I used some alcohol markers in oranges, reds and blacks to accentuate the colors. I took a white gel pen and put lines on the fish and colored in the eye with a black Sharpie. I used foam squares to add the fish to the background and took the small circles to make bubbles above the fish with white Hero Arts Unicorn ink and added the seaweed stamped images around with Stampin’ Up Always Artichoke ink. I used the white gel pen to go over the bubbles so they showed up better. Because the back had smudges on it, I glued another tag to it, then pulled a gold piece of ribbon through the hole to tie it to the bowl handle.
I’d like to say that I got busy in the craft room today, doing something, anything, but sadly, I did not. I think it’s the weather…Sunny and hot one minute, raining the next. It sounds crazy, but when the barometric pressure changes, my joints aren’t happy and let me know it. So instead of doing anything productive, I watched a couple of new YouTube videos and read.
Yesterday we went to friends and watched the new version of Jumanji. It was cute and one of those movies that you watch when you just want to relax…There’s no one suspended from a burning skyscraper, or any scenes that later give you nightmares…just a fun, family type movie.
I went to a few garage sales with my girlfriend this morning, and bought a couple of plants that will spread in my island, and that’s about it. I had high hopes for a couple of the places that we went, and was a little disappointed, but that’s the nature of garage sales..You never know what you’ll find, and that’s the part that’s fun..(or disappointing, however that particular day turns out.)
I just finished Lee Child’s book entitled The Midnight Line, and really enjoyed it. I’ve read all of his books, and this one was one of my favorites. It’s really well thought out and I recommend it highly.
Rich and I were going to take the Mustang for a small road trip tomorrow, as it just came back from the shop (needing a new carburetor), but the chance of rain is 70%, so I might be cracking open another book instead. There’s a good chance I’ll make a card as well….but I wouldn’t hold my breath if it’s a rainy day. That darn barometer….
Finally! The pop-up box card video is live. I know, it’s been forever, and I shouldn’t talk about a video until it’s ready to go live, because it’s just a nightmare for me, waiting. Patience is a virtue that I definitely lack.
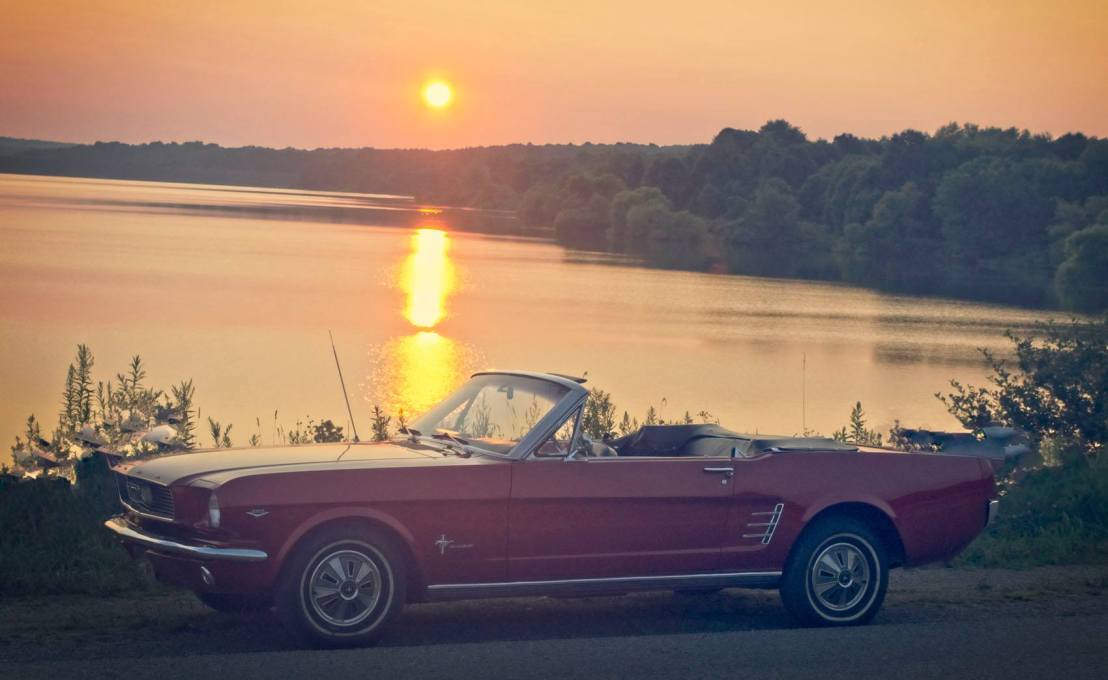
I couldn’t get a good photo of the card, and took probably thirty pictures, so had Rich take over. He did a great job, and he didn’t have the blurry results I did. I’m not sure what I was doing wrong, but every photo had one small aspect of the card that wasn’t in focus. It was making me crazy, so I threw in the towel and turned it over to an expert. He’s been doing some amazing photography this summer and I should start putting some of his photos up on the blog.
Here’s one that he took of his Mustang at sunset, at a lake near our house. I’m going to be doing a Mustang inspired card in my next couple of videos, so now you’ll know my inspiration..
I’ve wanted to make one of these pop up box cards, but had never found a plan that I could execute. I found a video from MFT that worked perfectly for me, and I hope for you as well.
I got the August Hero Arts Stamp Kit that is county fair inspired, and wanted to make a pop-up box card with these stamps and dies.
I used my iron to attach a napkin that reminded me of a circus tent to card stock and attached the video explaining how to do that.
Start with 11″ x 8 1/4″ paper and score on the 11″ length at 2 5/8″, 5 1/4″, 7 7/8″, and 10 1/2″. If you are cutting or scoring paper you’ve attached a napkin to, you’ll need to put the napkin face down for scoring or cutting. Then cut your paper on the 8 1/4″ length at 4 1/4″. What you have remaining, is a piece that is 4″ wide and a piece that is 4 1/4″ wide. You want to keep the 4 1/4″ wide piece for your box….you’ll need the 4″ side too, as we’re going to create the “shelves” for inside our box with that paper. Cut the 4″ piece that has a 1/2″ score on the end, and cut it at 3 5/8″. Then cut that piece into 1″ strips, so they can be the shelves. They have a score on either end and are perfect for the shelving.
I cut my own 1″ pieces, because I wanted white paper, instead of the napkin covered paper for this portion of my project.
I also took a piece of white scrap paper with two dies that looked like rolling fields and rolling ground to me, so I could attach them to my “shelves” and they would look like dirt and grass. I took Distress inks in greens and browns and colored my pieces, then dried them so I could cut them for on the shelves. These pieces each need to be 2 5/8″ long, so I cut them and glued them to my “shelves”. You need to be sure that they aren’t higher than the top score line of your box..One of mine was a little bit short, and I just made sure I covered that with one of my bigger elements. I took my 4 1/4″ box piece and scored it on the long side at 2″…I cut the 2″ side score lines down to the center score so my box had a top to it. The last 1/2″ score line, you’ll need to snip it off down to the 2″ mark and remove that, plus cut a small notch after the score, so we can attach our box together.
To put the shelves inside, start after your first score line with about a 1/4″ distance from it and so the shelf is below the center score line. Bend the fold toward the inside of the “shelf” and glue it down, then line up the next “shelf” directly behind the first, and glue it’s fold down, and continue til all four are glued in place. Then lay them down in a line on top of each other, and your other end folds are laying side by side in a straight row…bend the folds so they can work when the box is assembled, then lay them down again in a row and put glue on the tabs. I folded the box flat and held it in place after putting glue on my end notch as well and tucking it in so the box was glued together and the “shelves” were also glued in place. Once you reopen the box, the shelves are glued in place, as is the box if this is done properly.
I cut and colored with Stabilo markers the Hero Arts stamps. I used Versafine Onyx black ink and clear embossing powder on my images and heat set them. I stamped them with the Tim Holtz Stamp Platform.
My review of the Tim Holtz Stamp Platform is this: the lid is heavy, and I found it to be wearing for me, to do repetitive stamping with it…I was tired after only stamping a few images, and do not feel it’s the right tool for me. If you don’t have hand/wrist/strength issues, it would work perfectly, but I found the lid to be overly cumbersome.
To continue with the box card….I either die cut or fussy cut all of the shapes I needed, then used four card stock pieces that were 1 7/8″ x 2 1/2″ to decorate the top flaps of the box. I used Tombow Mono Aqua glue to adhere them. I attached a long fair scene to the bottom of the box and wrapped it around the sides. Then attached some of the images to pieces of acetate so the images looked like they were floating above the “shelves.” I cut thin strips of acetate in varying lengths and glued them to the backs of the images then to the back of the shelves. I glued the roller coaster to the back flap that stays straight when the card is open, and then put the food concession on the first shelf, the Ferris wheel on the second shelf, then the next two I tried to elevate the images so there was more dimension. I glued a ticket on the front flap of the box and added a piece of white cardstock to the back for writing, that was 2 1/4″ 1 7/8″ tall. I added some clouds on foam dimensionals to the front of the card and behind the airplane that is suspended above the box.