I show you how to replace the trimmer blades by pulling the blade off the back of the cutting piece, then clicking the replacement back into the same slot.
Today I relaxed. After yesterday’s drama, I just wanted to have some fun…So we went to see Crazy Rich Asians, and it was exactly what I needed. Sweet and funny, and romantic comedy always makes me happy.
After we got home, I finished a card I was making for one of my college girlfriends. it didn’t go well, and I’m pretty sure part of the video was deleted, but the card is done, and I can cross it off my things to do list. The hardest part in making cards for me, is getting them in the mail. I can’t just put a stamp on them and call it good, as my cards are almost always to thick in some small portion, and requires hand stamping, so I need to go to the post office for them to make that determination. I guess I could always assume they are too thick, but just when I think that’s the case, I get a different postal worker, and half of them are normal postage. Go figure…The post office is a mystery to me, that’s for sure. I mailed a card to a friend in Canada, and it took longer to get to her, than it did to get to another friend in the UK…
The Dollar Tree video continues to get a ton of views and is bringing a bunch of new people to our site. I can’t tell you how excited we are when we find a video that really resonates with people like this one did. Of course we also got six thumbs down. and that’s another mystery to me….what’s not to like about a Dollar Tree visit? If you don’t like the Dollar Tree, why watch the video at all? Maybe they thought I was tricking them with my tips…I just can’t figure it out. When I got the first thumbs down on a video, I was so disappointed, but now I realize it’s just a fact of life when you are on YouTube. It did take me a while before I stopped caring…probably two years, haha..
I have to be honest, the last couple of days have had some big ups and downs. I am thrilled at the response we’ve gotten from our field trip to the Dollar Tree…It’s kept me going when I haven’t felt the best. And speaking of that, I probably shouldn’t share things like this, but I’ve decided I just don’t care.
If you’ve never had a colonoscopy, it takes a full day of eating nothing, but clear liquids, then in the evening you drink 16 oz. of the most horrible “prep” drink known to man, then follow it with 32 oz of water. The water was the saving grace of that portion of the experience. Then this morning, I had to do it all over again, only this time, every sip of the “prep” drink made me sick, and I mean sick. I couldn’t keep it down. So for every one sip of “prep,” I had five big swallows of water…otherwise, it wasn’t going to happen. I even called the hospital and asked if I had to drink all of it, as I didn’t think I could do it. In the end, I drank almost all of it, enough to finish the real prep (and I’m sure you know what that was.)
So we got to the hospital, and they put me in a room that had a television that changed it’s own channel every three to five minutes. And you couldn’t choose a channel number, or use the down button for channels, you could only go forward. So if you wanted to go back to the channel it just left, you had to go through roughly sixty channels to get there. And of course you were only there for three to five minutes until it did it again. It was a minor annoyance, one I could definitely live with. Then came the IV…the nurse had a difficult time finding a vein that she liked, so put a tourniquet on both arms to see which hand she liked best. There will be bruises from the tourniquets, as she wasn’t shy about how tight she wanted them….and even that wasn’t bad.
We were ready and waiting, and the time for my appointment came and went. Then the nurse came in to tell me that their water had an issue, and was no longer clean…Didn’t sound like something that was healthy or viable, but they were going to work on it and get back to me. I knew immediately that there was no way I was getting any procedure done today, and had already told Rich there was no possibility of me doing the “prep” again…Even in ten years, I told him, I would definitely remember, and not want to do it again. The nurse gave me options…I could come back tomorrow and have it done, which meant no eating or drinking (or pain medication) for another 24 hours. That’s out of the question…I haven’t eaten in a day and a half, and they wanted to make it almost three—no thanks…They said I could re-schedule and re “prep”…that’s no even a possibility. So I told her I wasn’t rescheduling and I wasn’t going to stay for toast, and we left…I got home and drank Carnation Instant Breakfast and went to bed…crying of course, because of all I’d done to “prep” for the day, and never actually having anything done.
I know I should have the procedure done, but it’s just not in me to “reprep”… I would love to say that I don’t let anything bother me, but this did. It was too much, and I’m not going to put myself through it again. And Rich is all right with it…
I think the part I want to stress is that I was not able to take any pain medication and without it, I struggle to function. People in the medical community only see their specialty, which today, was not arthritis…So when they gave me a warm blanket and I put it under my lower back, the nurse came back and took it from under my back, and put it over me…I think I know where I want the blanket…So I explained I wanted it there for lower back pain, and she went to get another blanket….why didn’t she just ask me why I had the blanket behind me in the first place? It was a long two days and I don’t often like to share my “real” life, but this has been something I needed to say.
I’ve been thinking about all of the different products I use from the Dollar Tree, but normally not for the purpose they are intended. Rich and I took a sneaky tour of our local Dollar Tree and showed you as many ideas as I could think of…
1. Color Palette–I use them for all of my water mediums, but I recently saw Lindsay, the frugal crafter, take a piece of sandpaper to hers to allow her to simply scribble a watercolor pencil or Gelato across the surface to release pigment, and I’ll be showing it on an upcoming video.
(Peg Stamp Storage is at the bottom, sorry)
2. Posterboard–use it for Xmas trees, ornaments, and I use it for the backgrounds of my photos on YouTube.
3. Finger Paint paper pad and Art Pad. I use these for stamp cushions and to layer behind my projects to absorb messes.
4. Paper pads–great for gifts. I’ve linked one of my videos to this one.
5. Washi tape-it’s more papery than normal washi tape.
6. In auto dept., their masking tape isn’t as sticky as others, so works for holding down watercolor paper and remove without ripping. If you’re worried, rub it on your clothes or skin first to remove excess stick.
7. Foam tape in auto dept…great cheap foam tape.
8. Hair Gel–buy the blue for realistic water on cards, Check the link for video.
9. Hair Spray- works well for sealing projects with chalk or Mica Powder.
10. Spray bottles and pump bottles–work well for stamp cleanser and their spray bottle works like more expensive ones.
11. Hand Sanitizer–cleans MISTI and your hands..See video link.
12. Chap Eze use it to adhere red rubber stamps to adhere them to acrylic blocks or MISTI and clean up after is a breeze.
13.Shave Cream–use for marblizing card stock. check video link
14. Eye Shadow applicator, cosmetic wedges and blender sponges, use for applying chalks or as blending tools, and use for stencils.
15. Large Make Up Brush…use it with a small closed plastic container with corn starch or baby powder for wiping cardstock before using embossing powders to remove fingerprints, excess powder and smudges.
Nail products 16. Sanding block–great for removing rough edges on card stock
17. Eye Shadow in pots–use in place of Pearl Ex or for any time you want something glittery, check link at end of video for making pearlized inks.
In Laundry 18. Drier Sheets–use to remove intricate die cuts and leave nothing behind.
In Kitchen –19. Chopping Mats–use it to protect pages in your art journal and use for cutting surface for craft knife, as well as to put your project on like a craft mat.
In Child Dept. 20. Clasp Free Elastic Bands- use for book marks. see link
21. Baby Powder–for embossing, texture paste and DIY Gesso, see link
22. Baby Shampoo–DIY stamp cleanser 10 parts water to one part baby shampoo..
23. Baby Bibs-use in place of baby wipes (#24), as baby wipes add to trash, and baby bibs without plastic backing, velcro to the arm of my craft chair and clean up is a breeze.
25. Reading Glasses for those of us over forty.
26. Knee Highs–put two knee highs together and fill with 2 Tablespoon either baby powder or corn starch then knot them and cut off the excess. See link at end of video for heat embossing.
27. Decorator Dept. Take a small glass bowl and add flat backed marbles to hold your glue bottle with the point side down, so the glue is always ready to come out of the bottle.
28. Alcohol. I use 90% that’s available at your big stores like Walmart/Target, CVS and put a few drops with a baby dropper into your alcohol based markers to re juice them if they get dry. I also use it to take ink off of the inside of the MISTI. See link at end of video.
29. Cotton Swabs-applying chalk to projects. Or, removing ink from a portion of a stamp that you want to color with another ink.
30. Sheet Protectors–put them into a 3 ring binder and put your larger embossing folders inside. See link at end of video for Watercoloring on Embossing for demo.
31. Peg Stamp Storage in plastic goods–I love using these to hold my peg stamps, as they stand upright and you can see them easily, and they come in a variety of colors if you want pink for flowers, blue for holidays, etc. If you search my videos for peg stamp storage, you’ll find videos that show this is in action.
I spent the day eating candy and reading…I’m preparing for my colonoscopy on Tuesday, so thought it made a lot of sense to eat whatever made me happy today, as tomorrow I’m on a liquid (gross) diet, and then nothing until my 12:30PM appointment on Tuesday. It seems a little bit excessive, not being able to eat all day tomorrow and half of Tuesday, but I’m playing along. I really just wanted an excuse to eat chocolate, and this is the perfect excuse.
The book I read is by Harlan Coben, entitled Six Years. I really enjoy his books, especially his Myron Bollitar series. This one was a good read, and had a lot of twists, which I enjoy in a book. I like to be surprised, and this one had a few good surprises. If you like suspense, you might like this book.
As for tomorrow, I’m hoping to finish the card I started a few days ago, but didn’t have the energy to unbox and set up the new Vagabond..Hopefully we’ll make that a priority tomorrow…If not, it’ll probably be Wednesday, as I doubt I’ll feel like doing much on Tuesday.
Rich is working on the Dollar Tree video where I show over twenty items and how I use them with crafts. I hope viewers will enjoy watching it and get some good crafty DIY ideas…
I watched the video we made in the Dollar Tree and it’s kind of funny, because you can tell we’re sneaking around and trying not to draw attention to ourselves. It’s the kind of video where you expect to see another shopper step into the frame and ask why we’re filming hair spray. Boy, I wish someone had asked, and we could have put them in the video (with permission, of course.)
Today I had the joy of arranging my first colonoscopy next week. I know you’re all jealous, and wish it could be you….I’ll let you know the results when I get them. That appointment took most of our morning, and this afternoon, my girlfriend and I went shopping to find clothes for a wedding we’re attending. I hate buying dressy clothes, and especially hate shopping for wedding attire…I bought five or six outfits and hope one of them will work. Unfortunately, I can’t try on clothes in stores, as I need Rich to help with zippers and pulling dresses on and off….so I’ll be trying to find one that works. I just need ONE…..Yikes, it’s not easy being green….
I saw a video by a Stampin’ Up rep, Linda Bedinger, and here’s the link to it. https://www.youtube.com/watch?v=acWqvu8xqOI It was a fun card, and I wanted to make mine with a lot more butterfly action inside…
So I started by stamping seven of the same butterflies with Versafine Onyx Black ink and then putting clear embossing powder on them, and heat setting them.
I went to the Just for Fun website, and could only find one of the two butterfly stamps that I’d bought from them at a stamp show last year. I apologize that the second butterfly doesn’t seem to be available…I’m going to check with them to see it the other stamp was discontinued.
I stamped on Fabriano Hot Press Watercolor Paper and then used Derwent Watercolor pencils for my coloring. Link: http://tinyurl.com/y76ltr98 Personally, I prefer Prismacolor watercolor pencils for their creaminess, but had the Derwent pencils on hand and hadn’t used them yet. Here’s the link to Prismacolors….the largest set is 36 and I can’t recommend them enough. They are cheaper at DickBlick.com than in any of the craft stores, even using their largest coupons, fyi…(I don’t make any money from any products, I just have a strong opinion about these pencils.) http://tinyurl.com/yals6z7h
The colors I used were blues, yellows and greens and as I colored, I liquefied them by color family so that the brush didn’t have to be cleaned thoroughly between colors, until I reached another color family.
For the second card, I used purples, pinks, reds and oranges. That card is available to be seen on facebook and on my blog, craftingforalmosteveryone.com
I had a lot of issues with this card, as I used an embossing folder from Couture Creations called Magical. When running it through the Vagabond, I got it stuck and broke my Vagabond…Bummer! But also, because I’d accidentally left an extra plate inside the Vagabond, it squeezed the card so much that it tore the scored fold…I didn’t realize this until later in the card making process.
I’m not sure if the embossing folder I used is still available in stores, but I did find it on Ebay and here’s the link: http://tinyurl.com/y8w6fc5t
I rubbed a Perfect Plum ink pad from Stampin’ Up over the raised leaves, and let it dry. I eventually cut this piece to 4″ by 5 1/4″ and put it on an apricot colored card base that was 4 1/4″ x 5 1/2″…
I added a couple of layers of ribbon toward the left side of the card, then cut out a sentiment from an old Stampin’ Up set called Flight of the Butterfly. I stamped it with Versamark Ink and put some purple pearl embossing powder on it and heat set it.
I put foam tape behind the center one of the butterflies, and attached it to the card front, then used a black Sharpie on the edges of the sentiment, and attached it to the end of the butterfly with wet glue.
I used my score board on each butterfly and scored them through the center on the front and back so they will easily bend. Then I took Tombow Mono Aqua glue and glued the edges of the wings, so the butterflies will fold and still expand. Fold each butterfly in half, and attach each butterfly to the next. I lined them up so the wings would meet, and held them in place with clothespins and craft clips until the glue was set.. Some of my butterflies did not line up exactly as I had trimmed them by hand, so I trimmed off any excess and used the black Sharpie on the edges where they were only a little off. I added a sentiment to the inside of the card, then glued the right side of my stack of butterflies to the inside right side of the card, glued the wing on the top butterfly in my stack, and closed the card. I laid something heavy on it to hold it until the glue is set.
I decided the inside of the card needed more decorative features, so used three butterfly peg stamps with Simon Says Stamp Intense black ink and used alcohol markers to color them.
Smallest butterfly stamp link: http://tinyurl.com/y72ac59u
The other two butterfly stamps are no longer available, but here are the butterflies that are: http://tinyurl.com/yc3wwa7b
I used a variety of brands of alcohol markers to color and blend my butterflies in pinks, oranges and purples to match the butterflies.
I like the card when it’s open, as it looks like designer paper with butterflies flying away from it.
Today we went to the local Dollar Tree and I went through the entire store, discussing and videotaping all kinds of products that aren’t necessarily designed for crafts, but how I use them in a crafty fashion. I had intended to ask the manager if it was OK to do the video, but they were super busy, so we just did it on the sly. I felt kind of dirty doing it that way, and people were giving me really odd looks, but that’s OK…the important part is that we made the video. Rich even took the time to take a video of the two of us in the store, so people know he’s part of the team (he’s a ham…) I’m not sure how many products I talked about, but there were at least twenty-five. I had a lot of fun, and when we left, I was worried someone would stop me because I knew I had a guilty look on my face, like I’d stolen something…I’m just a rule follower, darn it.
So my Vagabond II die cutting machine came in the mail, and as much as I want to jump right into setting it up, I’m a little bit tired, and think I’ll do it tomorrow. Yesterday, HSN (Home Shopping Network) was having a craft day. They were featuring as their “Today’s Special Value” a very small electric die cutting/embossing machine. I was laughing so hard, because the demonstrator was showing how even using a battery instead of plugging into electric, this machine has serious power….and then the thing she shoved inside got stuck. I mean stuck. They left the camera on her long enough for me to realize that whatever was in there, wasn’t coming out, and then they went to graphics. Talked about how it knows when things are too thick, and will spit them back out, blah blah blah. And then they went back to the demonstrator, who now had (clearly) a new machine, as she gave them the thumbs up for it working again. Yes, it was working, because they ran onto the stage, grabbed the broken one, and replaced it with one that worked. And I thought i was the only one who could completely break an unbreakable tool….It’s good to not be alone..
I wanted to make a birthday card today, but without the Vagabond, I was stuck. I can’t believe I ever worked without one, as it makes life so much easier. I thought I had a circle cutter that would work, but couldn’t find that, and then I thought I’d probably have a circle punch that was big enough, but clearly, that was not the case. So I gave up on the project until tomorrow, when hopefully, the Vagabond should be here.
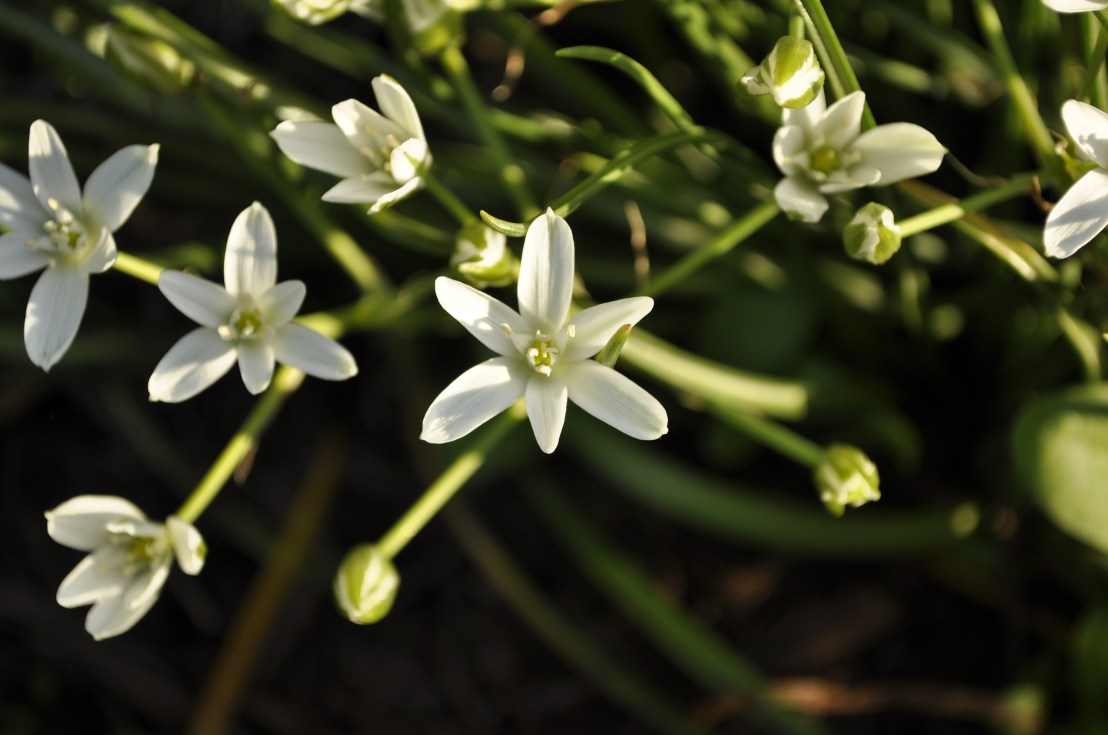
I did make a small haul video, as a lot of viewers like them, and I think they’re kind of fun as well. I decided to put up another of Rich’s photos, one from this spring. I really liked it and hope you do too. He didn’t do anything to the image, it’s just as it was when he took it. I know he does a lot of Photoshopping, but this hasn’t been touched.
My favorite flower is a stephanotis, and this flower reminds me of it..I’ll post a photo of it below. I did a Google search, and the second photo is Stephanotis…I carried them in my wedding bouquet along with white roses and orchids. It was a really big bouquet and was so heavy, my hand had a welt from carrying it. I loved it though, as the front of my dress from the waist down was really plain, and I wanted the bouquet to be the star of the gown….And in my opinion, it was. Maybe someday I’ll post some photos of us when we were married, so you can see the bouquet..and how young we were…Almost thirty-six years ago, Wow, time passes fast.
I promised a friend that I would make a card with watercoloring. I used Spellbinders M-Bossabilities EL-007 that has two patterns in one. Here’s a link to it at Amazon, but you might want to check around for a lower price. http://tinyurl.com/yaa8w2gt
I used Stampin’ Up Wisteria Wonder ink and rubbed it over the side that’s NOT raised. I show me putting it on the raised side, but that isn’t right, you want to put it on the side that’s not raised, than ran it through the Vagabond. You need to remember that these are not normal embossing folders, and are much thicker, so make sure you adjust your sandwich for your die cutter accordingly. A sandwich is the plastic plates you surround your embossing folder with before you insert it into the machine.
I showed my large embossing folders and my storage for them. I use a 3 ring binder with plastic sleeves inside. I have another 3 ring binder that has pictures of what each embossing folder creates, and I letter each folder A-Z, and the letter is written on the picture and the embossing folder, so I know which embossing folder makes which picture. I slide the embossing folder into it’s own sleeve. This is my storage for large embossing folders and I used an embossing folder zip holder for the smaller ones. Here’s a link to it. http://tinyurl.com/yboawnhm
Once the embossing folder comes out of the Vagabond, the ink will be on the raised side. I glued a 4 3/4″ x 5 3/4″ piece of black card stock to the back of my piece of embossed cardstock that’s 4 5/8″ x 5 5/8″
The stamp set I used was from Penny Black called Gentle Whispers 040-331 and here’s a link to it: http://tinyurl.com/y9wx4wxu
The watercolor pencils I used were from Derwent and here’s a link to them. https://www.dickblick.com/products/derwent-watercolor-pencils/
The pencils I used were 26, 27, 25. 23. 57. 51. 50. and 48. I used a brush to wet my stamp and used the pencils to color the image. You can also wet the very end of the tip of the pencil to color the image, but being careful not to get the wood part wet. This is a fun technique because it really looks like you’ve watercolored the orchids when you really only stamped them.
I did go back over the image a few times to get the colors to look the way I wanted them, and had to re-wet the paper (5 x 7) piece of Fabriano hot press paper. I bought mine at A C Moore, but they don’t have an online store, so here’s the closest I could get
Link: https://www.dickblick.com/products/fabriano-studio-watercolor-pads/ I bought the 140 lb hot press 9 x 12 pad.
With a coupon at A C Moore, it was around $10.
After coloring the image, I used the pencils add more detail to the image (on the paper, not the stamp), and used the same pencils and a water brush to define some of the image lines and ensure the colors were the way I wanted them. I dried it in between with my heat gun and made sure it was dry, then stamped over the image using Wisteria Wonder and Old Olive Stampin Up inks. Because it was in the MISTI, I could do that. Sorry my camera cut out while I was doing this, and while I was cutting out the image, crap!
I decided to liquefy the ink on the front of the embossed image, and moved the ink around to make it more water-colory (not a word, but I’m making it one.)
I put a piece of clear purple chiffon? ribbon on the front near the bottom section of the card front, and put some wet glue under it to keep it in place. I added a strip sentiment that was 4 3/4″ long and about 1/2″ tall with “thanks for the smile” sentiment that I stamped and embossed and heat set. I put the whole thing on a gray piece of cardstock that was 10″ x 7″ scored at 5″ to make a 5 x 7″ card.
I used peg stamps for my envelope: pegstamps.com
Triple delicious flower http://tinyurl.com/y9by62sz
fern http://tinyurl.com/y7tforcp
I stamped the flowers with Wisteria Wonder and colored them the same ink with a micro brush. Here’s a link to the microbrushes I buy. http://tinyurl.com/ydfdjb6u
The ferns were stamped with Old Olive ink from Stampin’ Up.